Onni
-
Posts
464 -
Joined
-
Last visited
-
Days Won
203
Content Type
Profiles
Forums
Gallery
Events
Everything posted by Onni
-
Nice detail. Welcome aboard Miro.
-
Very nice James. Welcome!
-

What's on your workbench?
Onni replied to Gwyl Blaser's topic in General Ships In Bottles Discussion
That's beautiful Igor. What do you use to make the sea? -
Thanks Spanky.
-
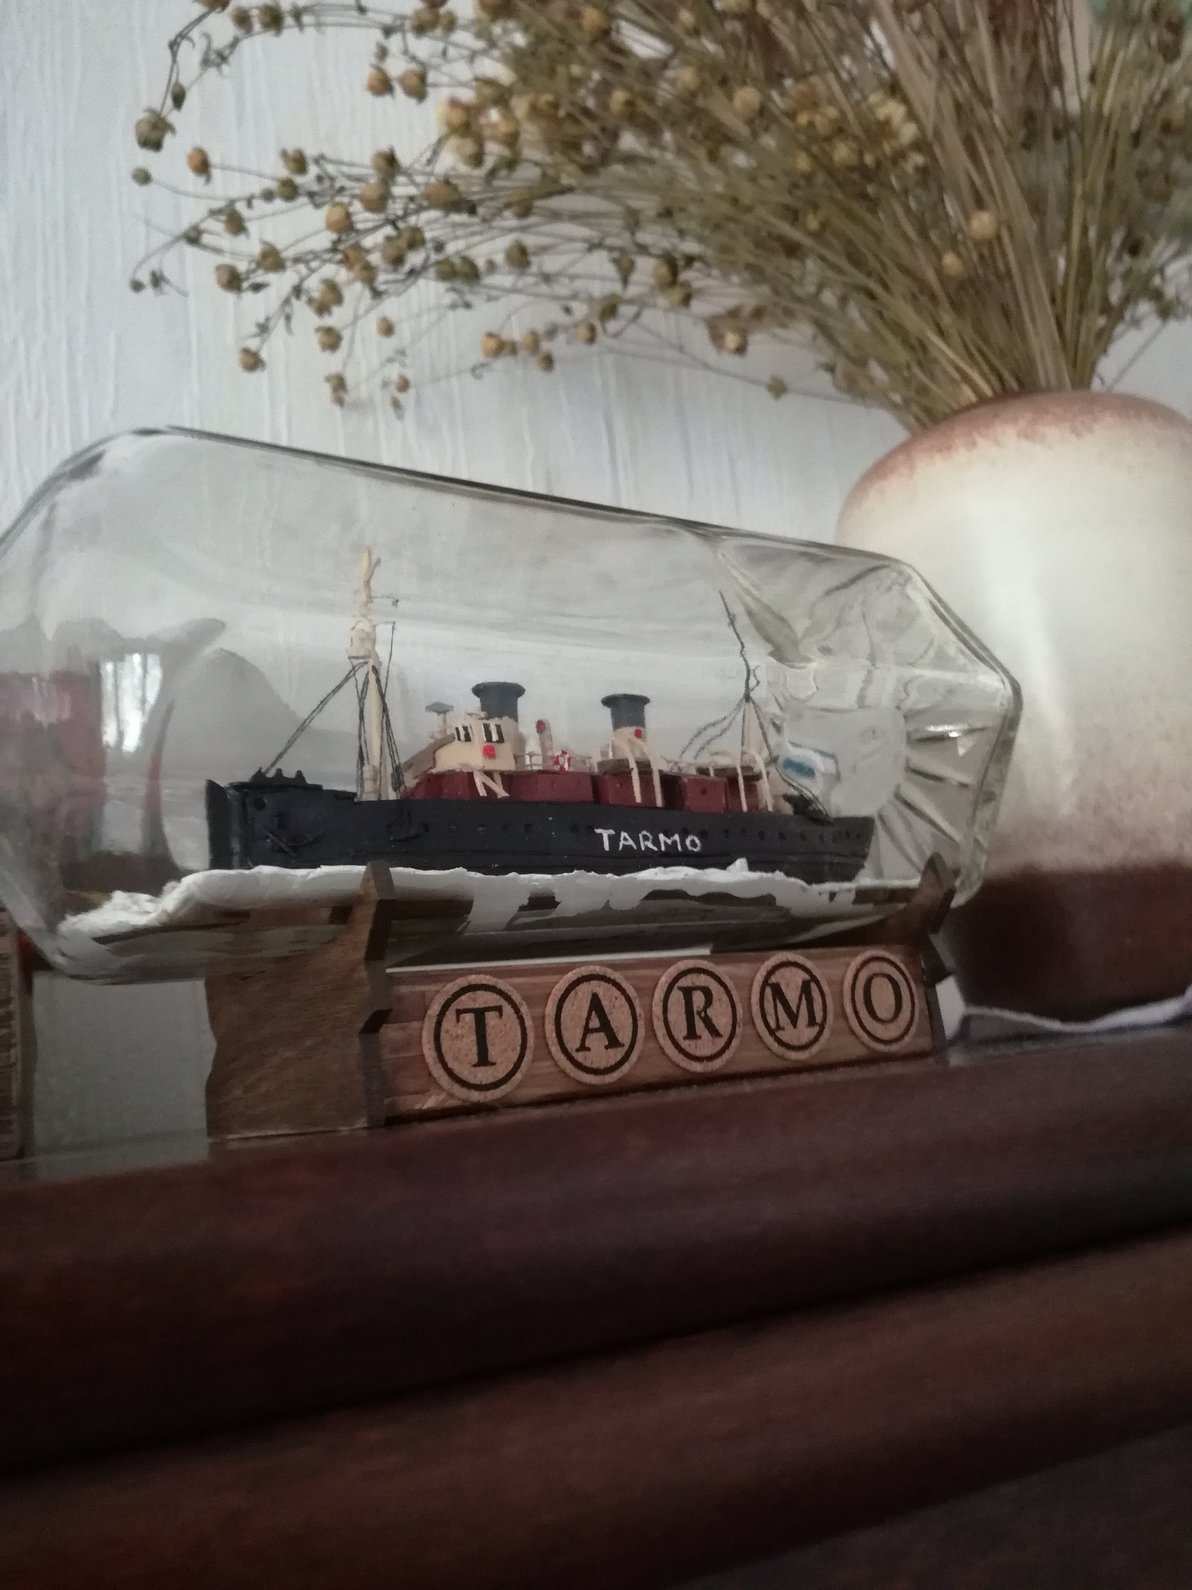
A couple of people have suggested that I should donate Tarmo to Kotka Maritime Museum but I'm not sure that they would want it,plus its always hard for me to give away a ship in a bottle which has taken several months to make. If I do I could perhaps donate with her 'Kemi'; a finnish lightship which is under going renovation in Kotka Harbour close to where Tarmo is moored. I built this model in 2013 and it has a working light which was a cheap bicycle lamp. This involved drilling a small hole through the bottle to insert the cable. (Kemi is a town in North West Finland).


-
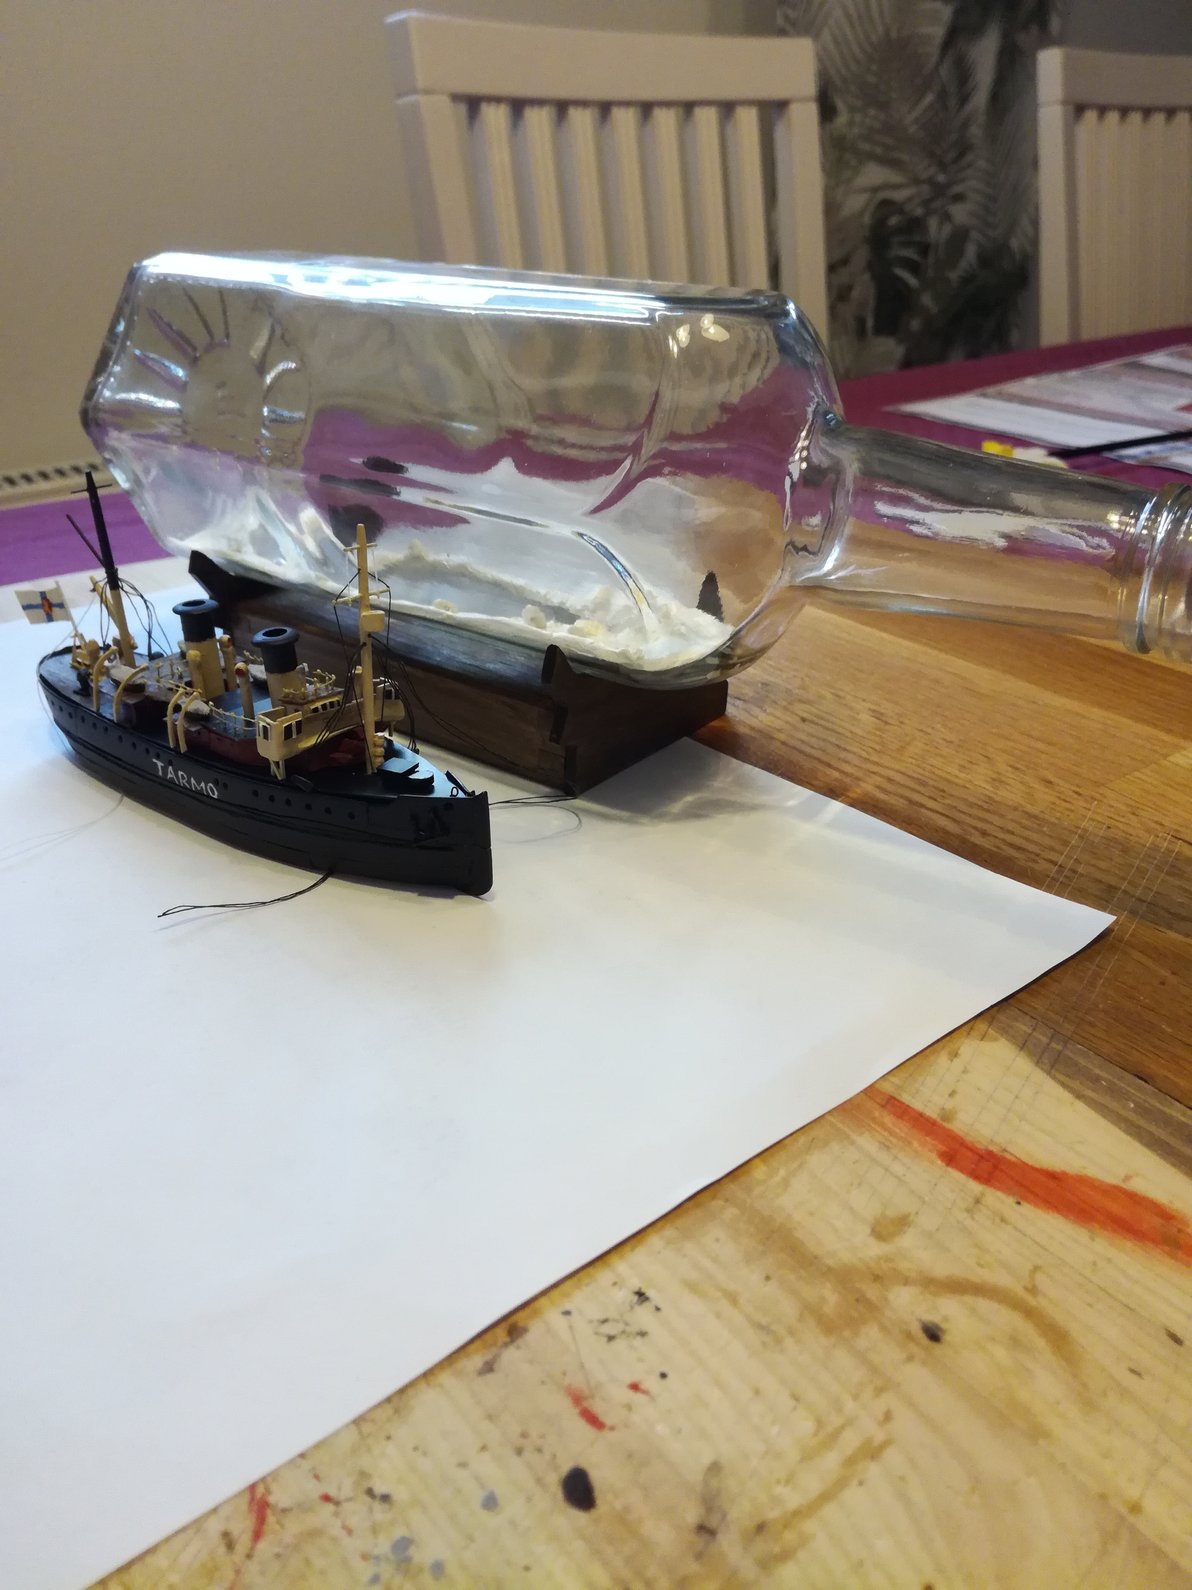
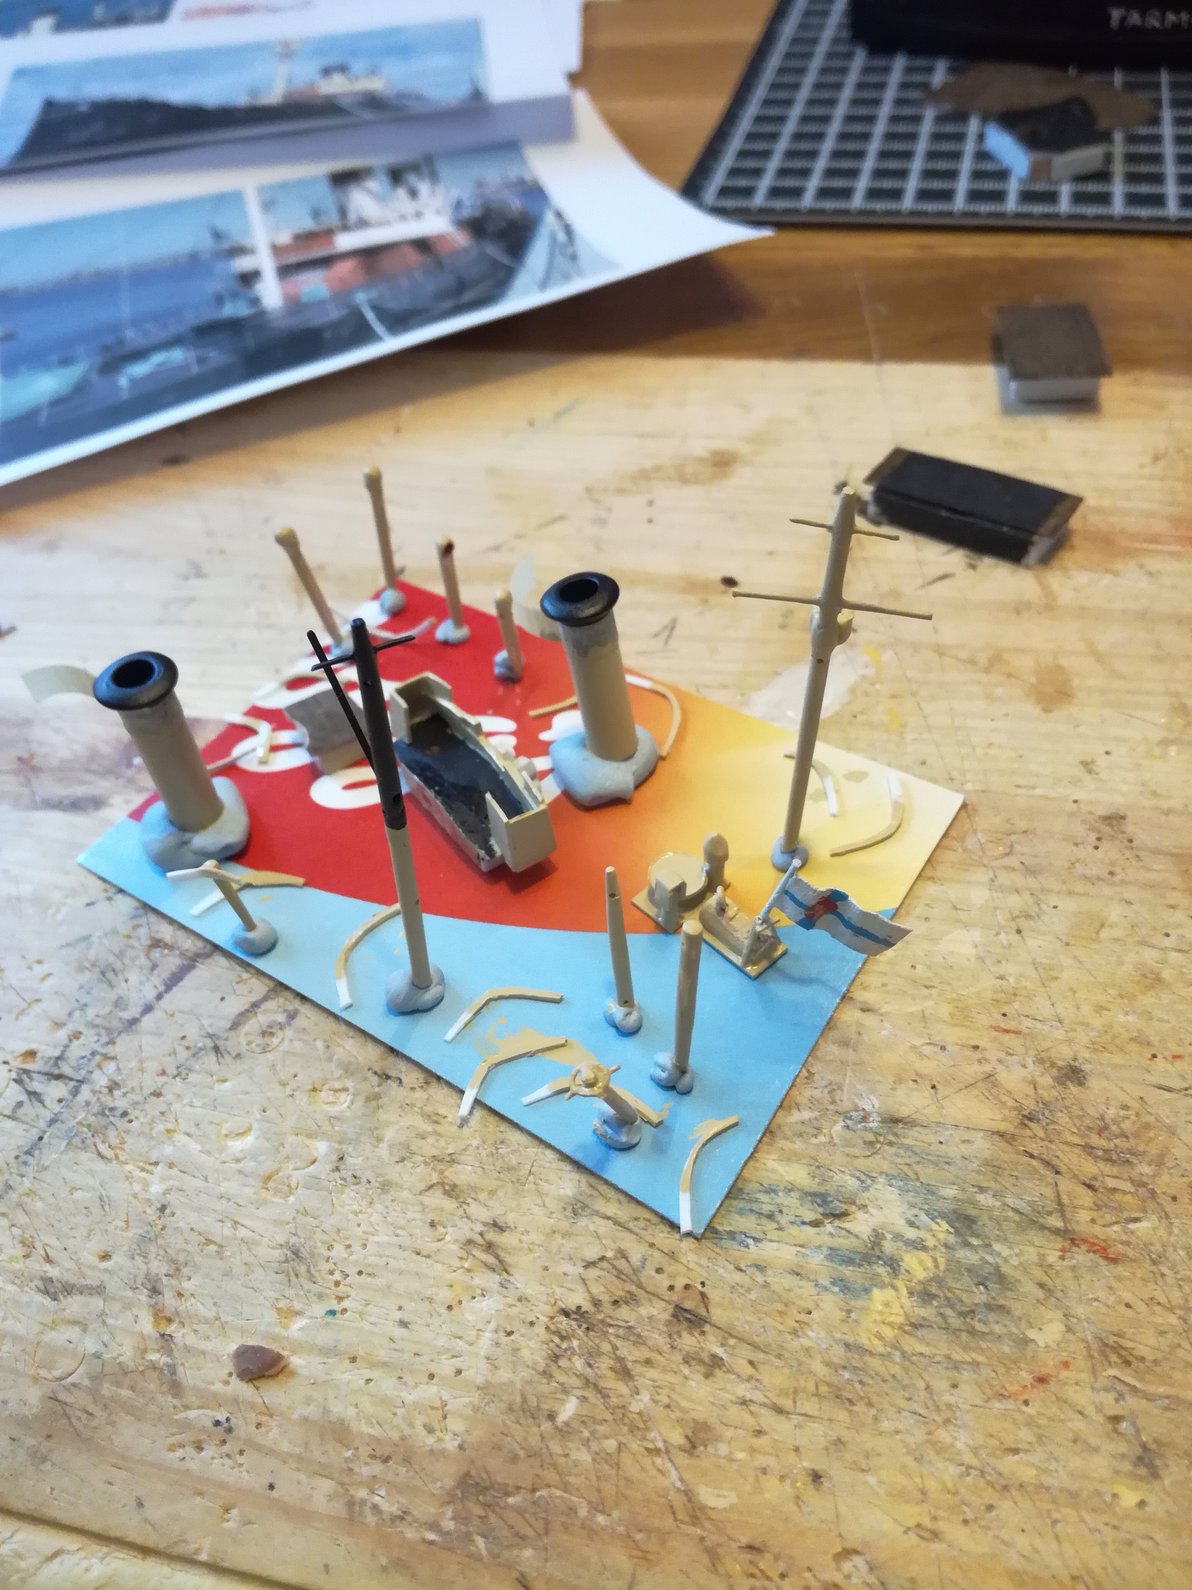
Deck house and steerage in place.Erected fore mast and rigging.I cut loose ends of rigging away with a small piece of a razor blade glued onto an old wire coat hanger. Capstan and a few other bits and pieces fixed in place. Re modelled some of the ice in front of 'Tarmo' and she's done.Clean up any glue deposits or any other bits that shouldn't be left inside and seal the bottle with a cork and a seal of wax with the letter 'T' embossed on it. Luckily I had a turks head left over from 'HMS Trincomalee' that fitted this bottle neck so that I didn't need to spend half an hour making a new one.Difficult to get a decent photo of the finished item but I think its ok.


-
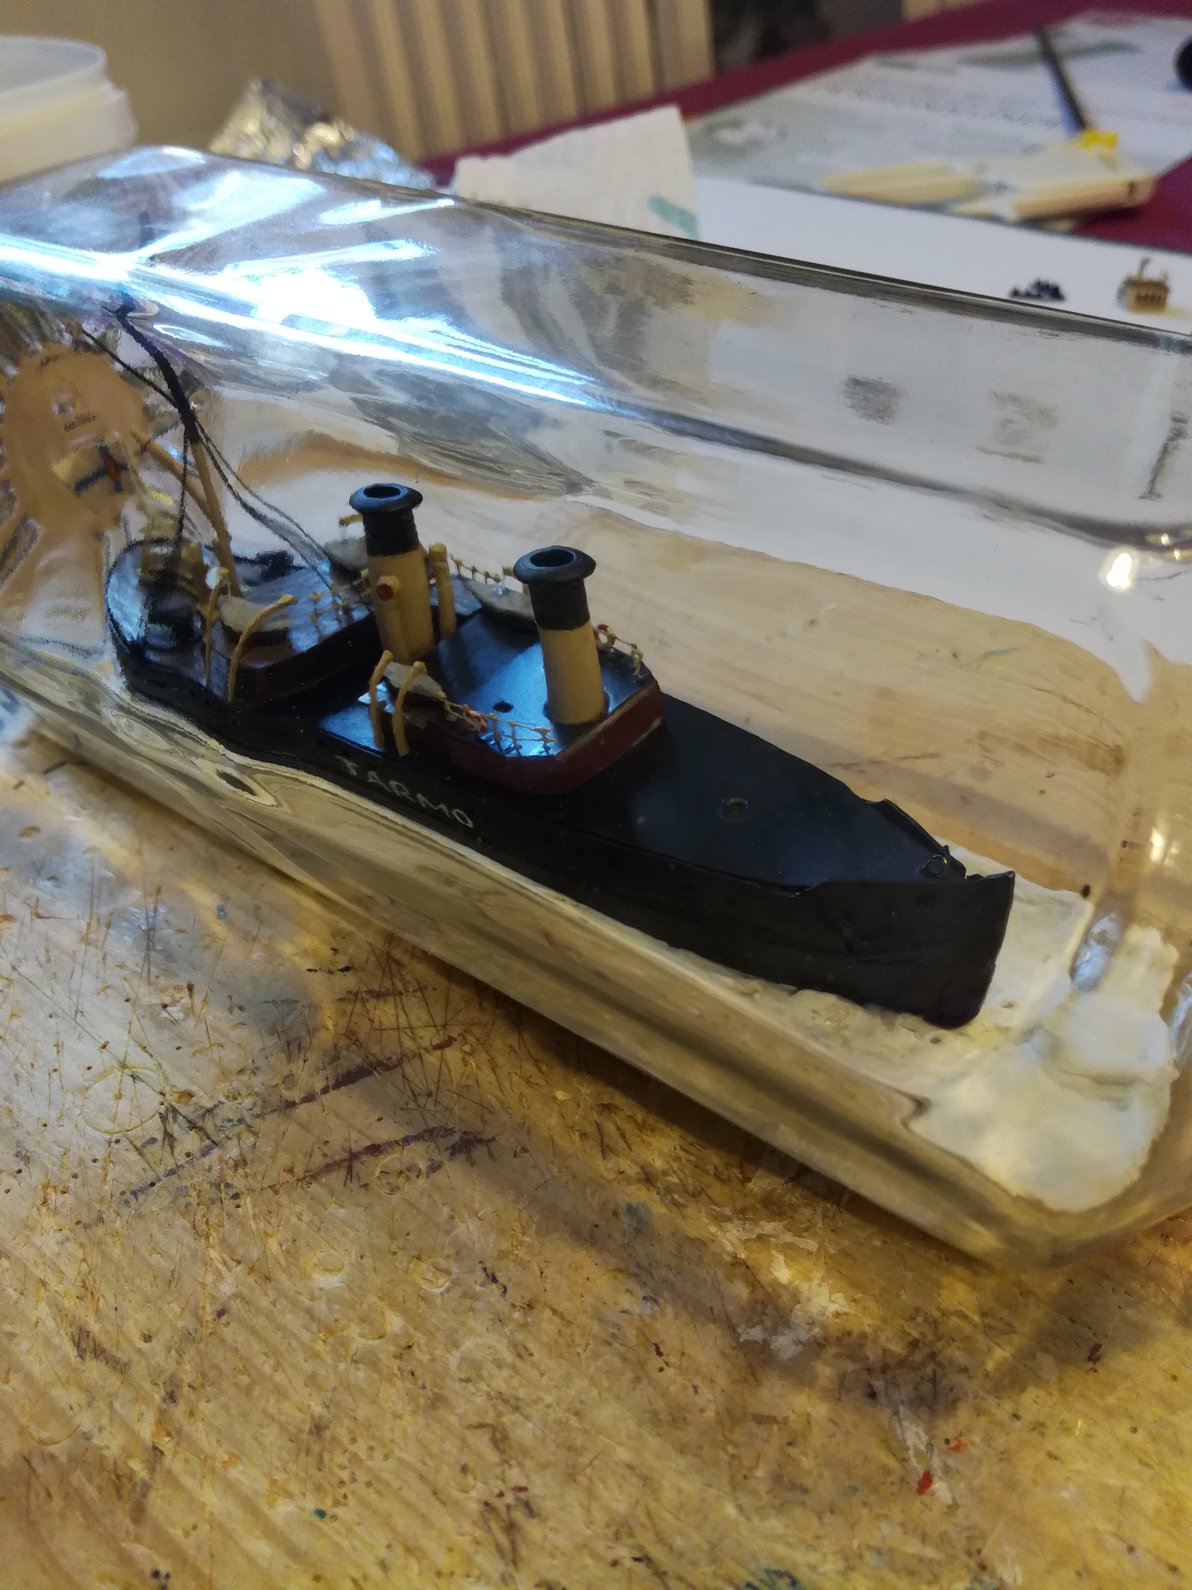
First funnel (smoke stack) in place and fixed together with the two ventilation pipes.Continue to second funnel and bridge area. A peek through the bottle neck.


-
It's not actually a split deck but a whole one which I make flexible enough while steaming it over a boiling kettle.(Don't try this at home .) It's safer to use a commercial steamer.
-
I do not have any pictures of the deck going in because after I steam the veneer aft deck it has to go in very quickly. Unfortunately it splits a bit but luckily it is in a place that will be hidden. Fore deck (white 0,5mm plastic) inserts easily and is no problem.The funnel guides have a double function i.e. to act as a secure glueing place for the funnels and also for pinning the deck in place.Flag staff fixed;it also acts as a rigging tie off.Aft mast and aft deck in situ.


-
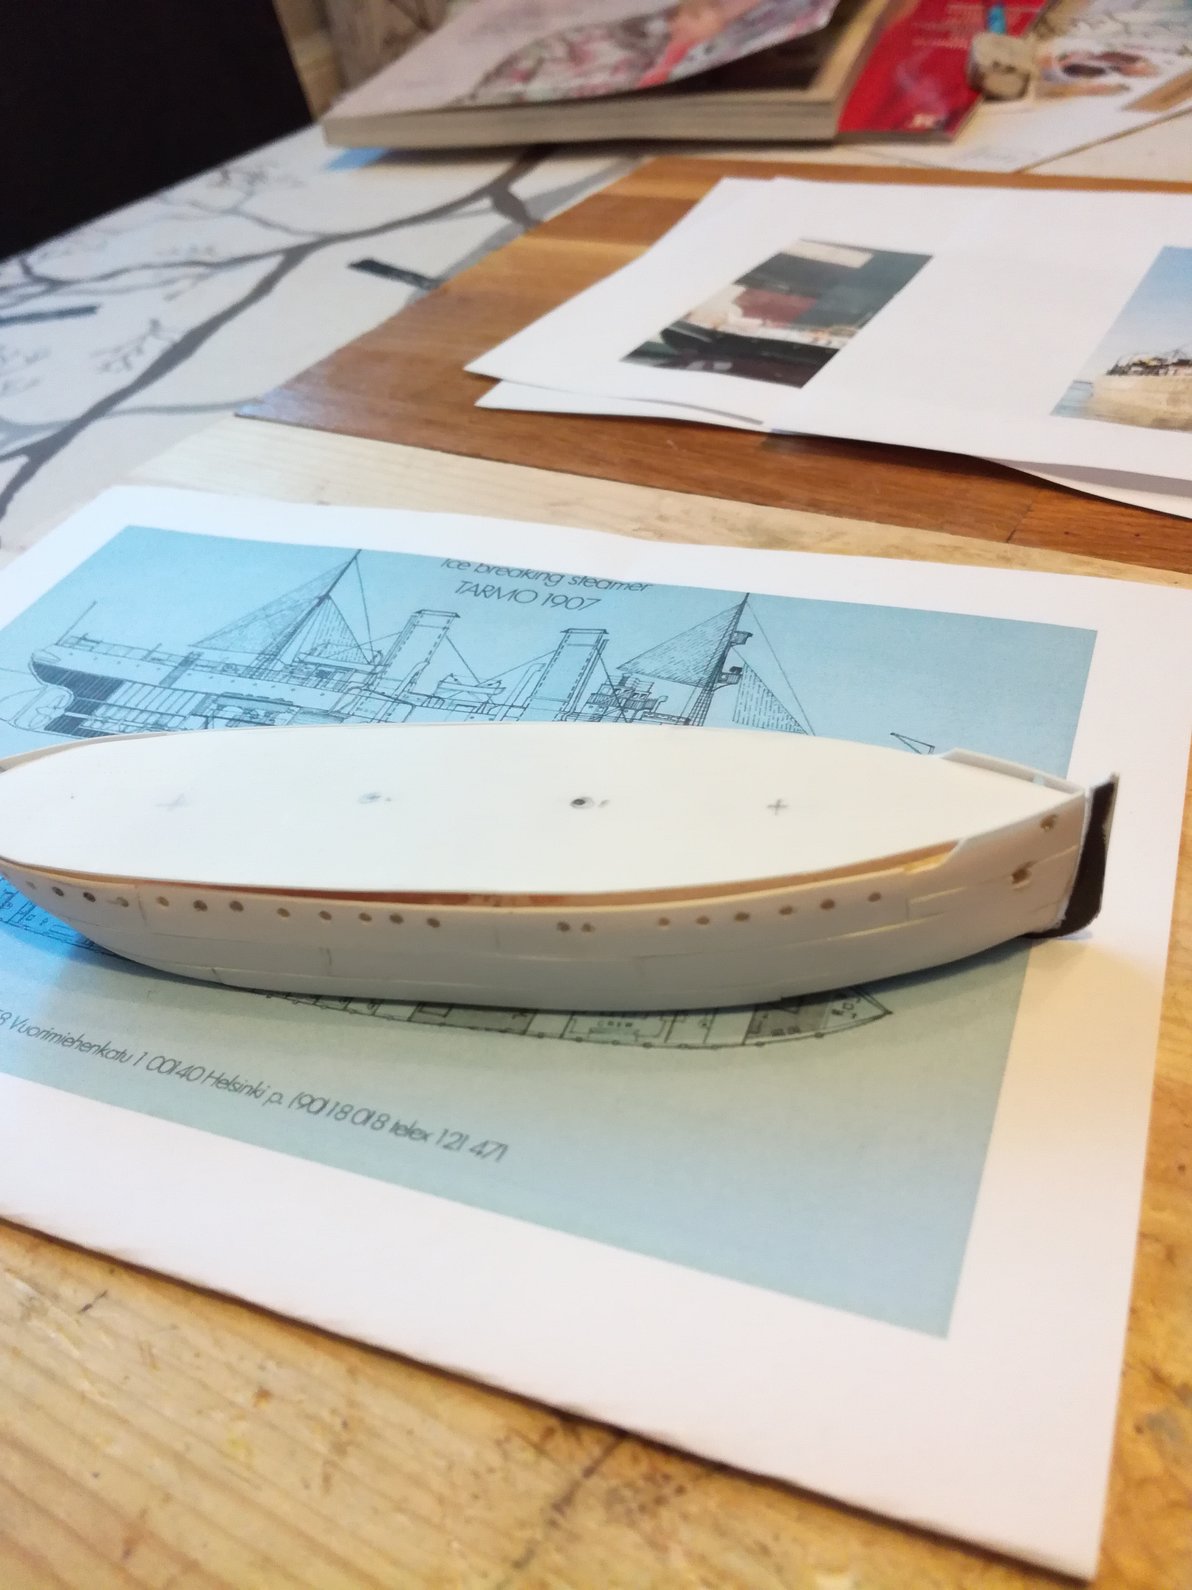
Main part of the hull in place.Next will be the deck which is in two pieces representing steel deck at the fore and planked deck aft.


-
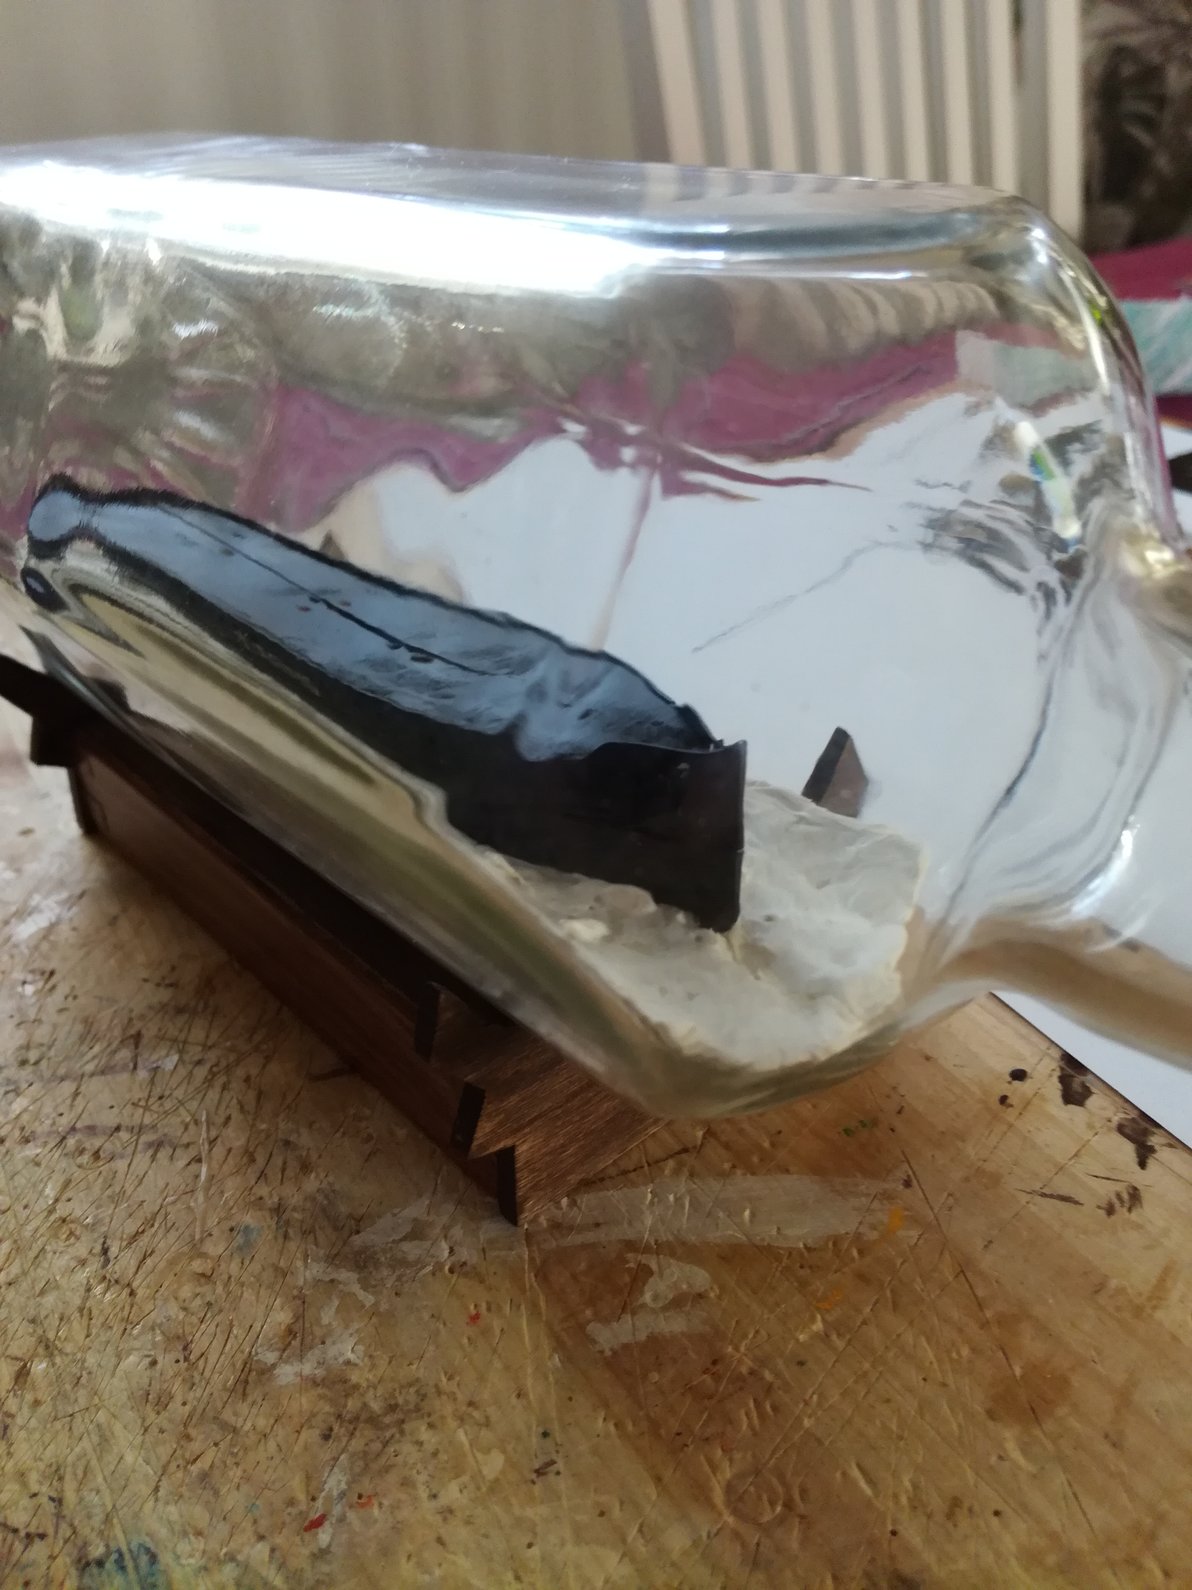
Port side goes in easily and I glue them together and then fix the base of the hull with epoxy glue at the bottom of the bottle because the plasticine ice will not hold it by itself.


-
Usually when I do the centre cut of the hull I cut it a bit off centre (1-2mm) so that the masts have somewhere solid to sit but in doing this it leaves one side wider than the other which in this case is the starboard side. Its a tight squeeze!

-
Rigging completed and she is ready to go in! The ice/sea base will not go in one piece so I have to cut it in half.In the last photo is a breakdown of the ship which is ready to go inside the bottle.


-
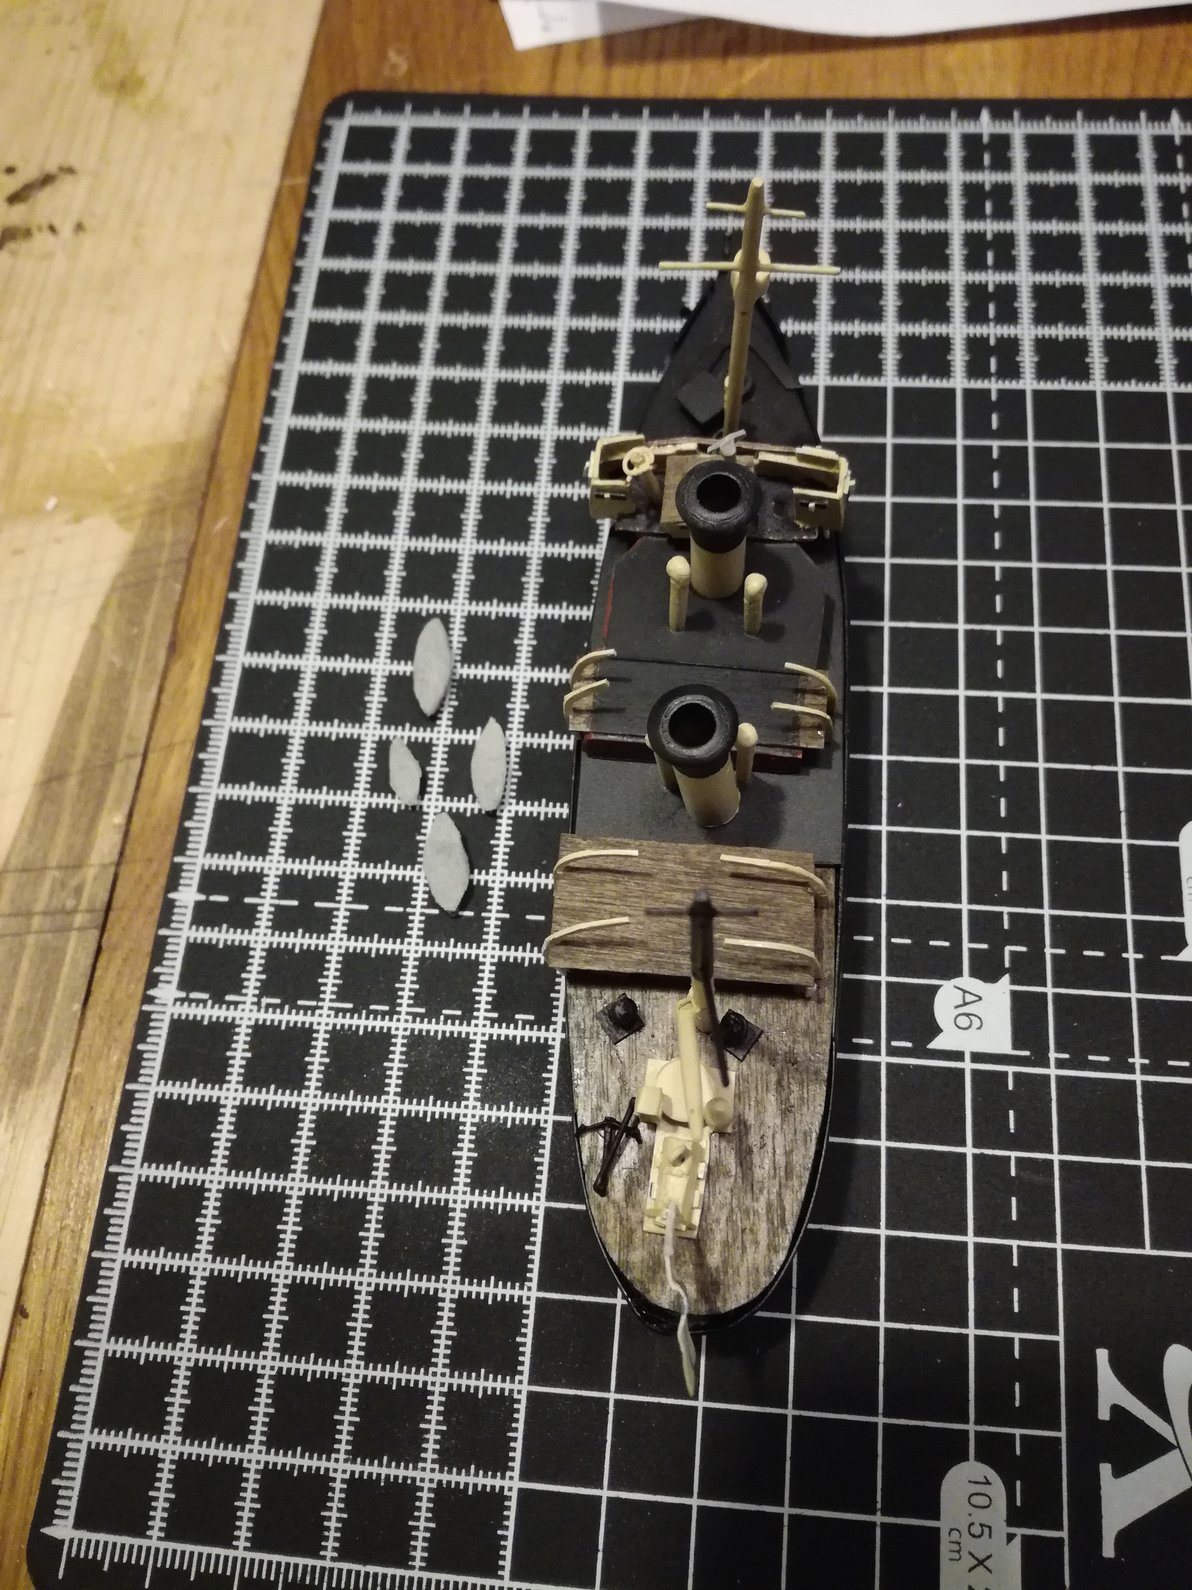
Made lifeboat davits,anchors and added some railings together with other bits and pieces. More painting. I cannot add railings to the ships deck because of the logistics of getting the deck in one piece through the bottle neck.


-
Bit more of the superstructure done in a raw form. This will not be a super detailed model especially as I want to complete it soon.


-
Well the cutting of the hull in four pieces did not go so well. Like some other people on this forum I belong to a modelling club where we pool all our resources,machines etc. I get to use a very fine bladed band saw for the cutting but unfortunately the blade breaks on the last cut,which causes it to go a bit askew as you can see in some of the pictures.Luckily as the hull is black it may not be too noticeable.Anyway had to do a new paint job.Started making some of the deck items,bridge etc...Modelled the ice scene;not much room inside the bottle for anything larger.


-
Next a bit of black spray paint and position the funnels and masts. After that comes the cutting of the hull into four pieces


-
Added the business end of the icebreaker and made the hawse openings for the anchors.


-
A start;carved the hull with wood and then skinned her with styrene white plastic to try to make it look like steel plating.The hull will have to be cut into at least four different pieces to enable it to fit through the bottle neck. The cutting is going to be a bit nerve wracking as a mistake means starting from scratch again!


-
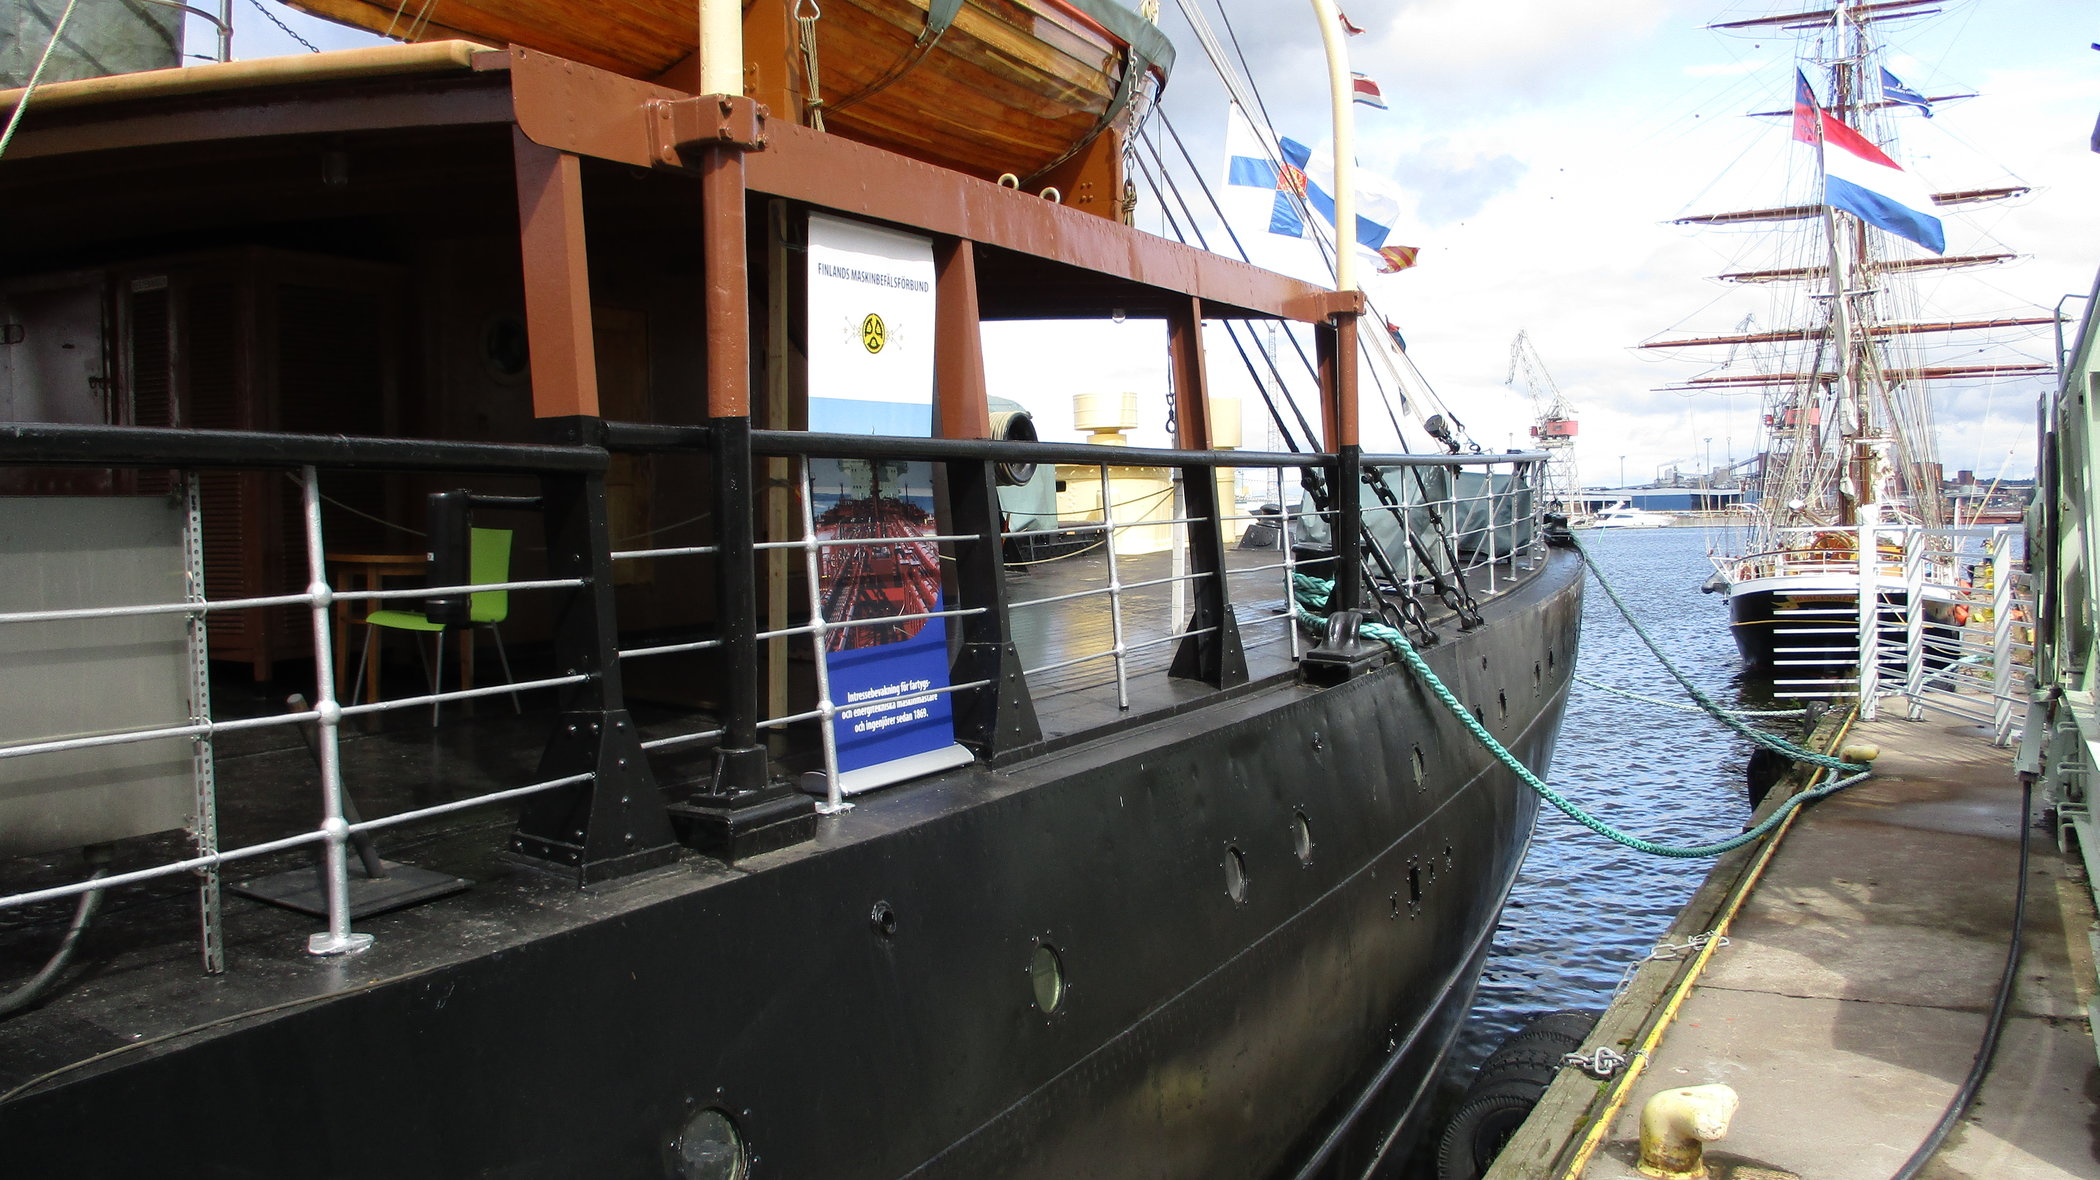
Seeing as we still have snow and ice here in Finland ,even though it is spring; I thought that I would try to build 'Tarmo' a Finnish icebreaker constructed in Britain in 1907 and in operation until 1970.It is now a museum ship in Kotka and I had the good fortune to climb aboard her last Summer during the Tall Ships race staged in Kotka.


-
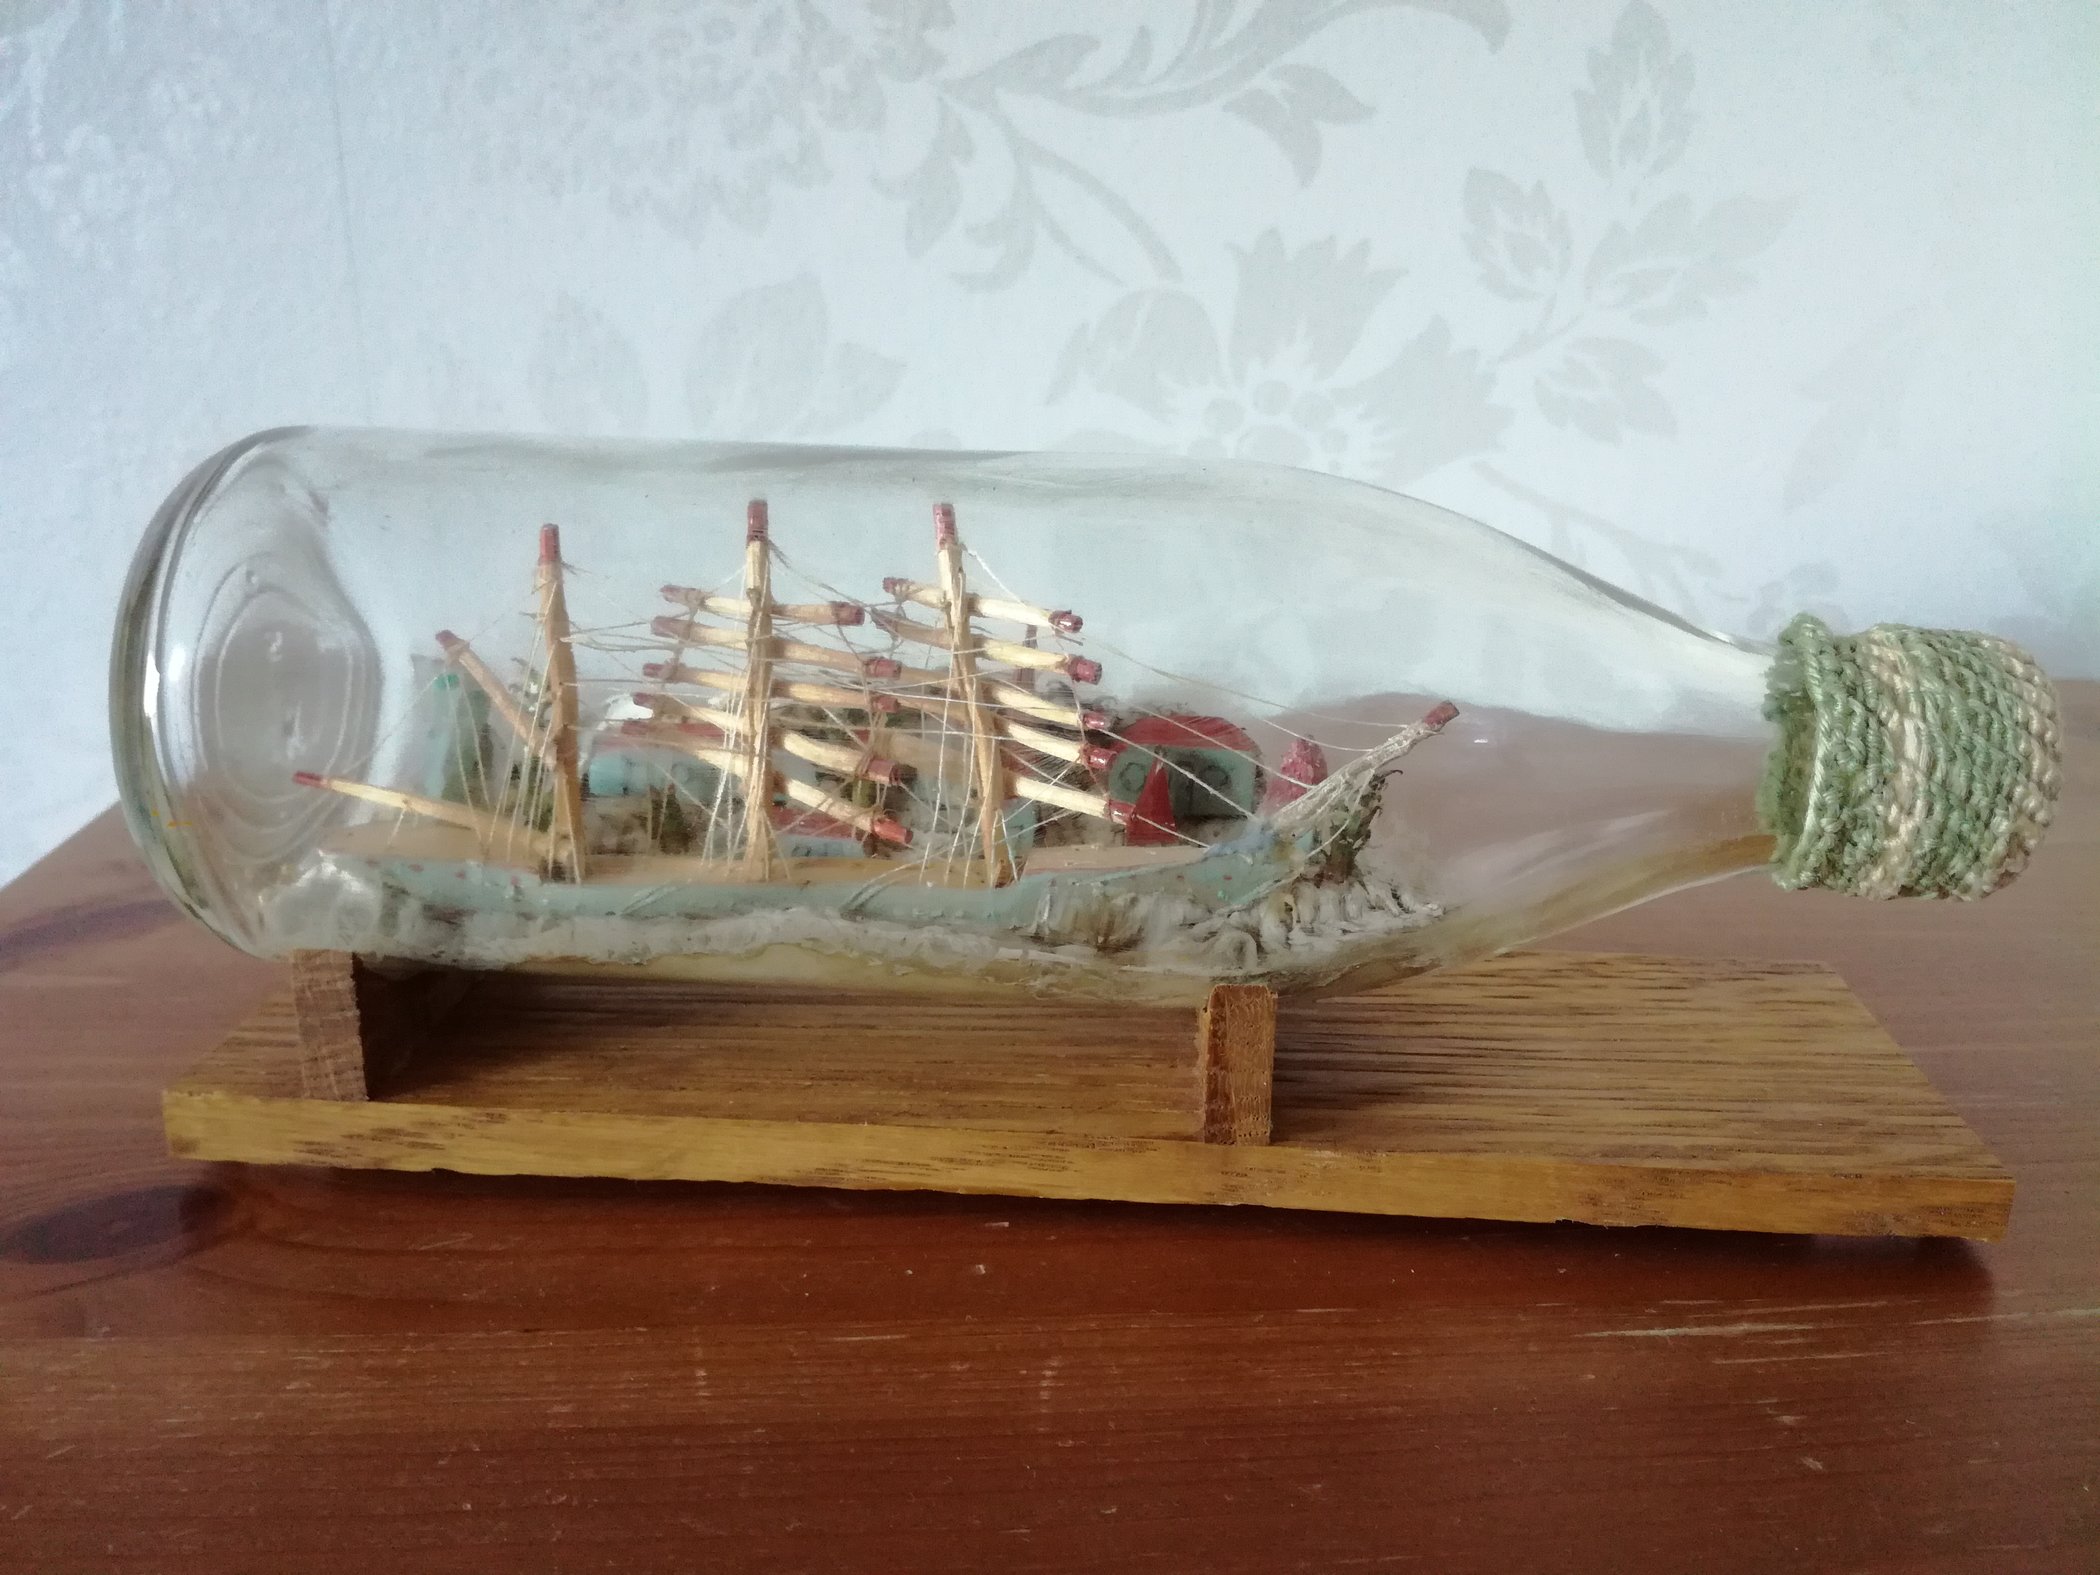
I was given this ship in a bottle by a friend. The bowsprit was broken and needed repairing and the bottle was very dirty inside and needed a clean up.There was no cork in the end of the bottle,only a colourful knitted cover so I imagine over the decades dirt had been building up inside. Age wise ;not really sure because those type of bottles have been around a long time in Finland but I'm guessing early 1940's to maybe late 50's. I am particularly impressed by the landscape behind the ship. I think that it is a very pleasing model. PS.I just placed it on a spare stand I had laying about.


-
Nice little ship Spanky.Good to have you aboard.I also started with the book 'Sailing in Glass' many years ago.
-
If you check out the Swedish bottled ships web site there is a great tool for creating turks head knots. Of course its in swedish but just remember vänster is left and höger is right. http://www.flaskskepparna.se/bygga/bygga valknop.htm