Onni
-
Posts
464 -
Joined
-
Last visited
-
Days Won
203
Content Type
Profiles
Forums
Gallery
Events
Everything posted by Onni
-
All these hulls never made it into a bottle, for one reason or another. I'm getting quite a collection now! Anybody else have any failed ship stories that never got off the drawing board and into a bottle?

- 1 reply
-
- 6
-

-

What's on your workbench?
Onni replied to Gwyl Blaser's topic in General Ships In Bottles Discussion
"Fram" designed and built by Colin Archer and used by Roald Amundsen for his Antarctic expedition.


-
What's on your workbench?
Onni replied to Gwyl Blaser's topic in General Ships In Bottles Discussion
Just completed Hms Campbeltown (ex 131 Buchanan) depicting the raid on St.Nazaire docks in 1942. Not that easy to depict a dockyard in a 75cl bottle but you get the idea.


- 357 replies
-
- 12
-
-
Welcome aboard bsmith. I sometimes buy bottles from charity shops.I think you call them thrift stores in the states. Quite often you can pick up a nice specimen for a few bucks. Other than that I get them from friends or else bottle banks. Resources, well first delve into this site for some great tips; perhaps invest in a ships in bottles book and then set about deciding what ship or boat you really want to make. Get drawings from books or the net and size them to fit your bottle. The internal size of your bottle will determine the scale of the model .A lot of tools can be home made . I'm sure other people can chip in here to give some good advice.
-
I always had trouble with the keel twisting out of shape after the bulkheads were glued in place so probably I should of made a jig out of wood or metal for the keel to sit in and keep it straight. Great work by the way, you need a lot of patience with card/paper models.
-
The paper that you talk about is just masking tape to protect what I had already spray painted on Gypsy Moth.
-
Have you considered maybe to have the catarmaran sailing at the base of a different bottle with the bottle being upright ,if you understand what I mean. Then you would not have any troubles with the mast height or that it will touch the glass while heeling over. Check out my Gypsy Moth in build logs.
-
What's on your workbench?
Onni replied to Gwyl Blaser's topic in General Ships In Bottles Discussion
Yes I did;it came to approx 72 hours for my rendition of the Golden Hind in 2013.
- 357 replies
-
- 10
-
-
What's on your workbench?
Onni replied to Gwyl Blaser's topic in General Ships In Bottles Discussion
Medway Queen,heroine of Dunkirk (1940) where she rescued 7000 allied troops from the beaches. Here she is in post war livery. Now a museum paddle ship in Gillingham,Kent,England.


-
Hi Moab, The sails are made from a man's white handkerchief stained slightly with tea/coffee then when dried I wrap it around a clean paint roller wrapped in grease proof paper before I brush it over with a diluted wood glue which when dry gives a slight curve to form the sail. The sea/ocean is simply plasticine painted with acrylic paints and modelled to resemble the sea( at least that's the idea!)
-
Welcome Bosun Moon. A ship of a foot in length or more would have to be scratch built; that's if you could find a bottle of that size to place it in. In any event,scratch built is the way to go,you can make any ship you want to,learn the ropes as you progress and the satisfaction that it is all your own work .
-
I have also made these paper and card hulls for many years using similar items as John but download ship plans/drawings from the internet and then resize them through Photoshop to a scale that I need for a particular bottle. I don't do this for every model as it is very time consuming and rather tedious but its just to give an idea of what the shape of a hull should look like. In the photo l-r Mayflower,PT109,Black Pearl.


-
I see that you have done a bit more detail work on the octopus stand;it looks fantastic! Mayflower doesn't look too bad either (looks great). Well done.
-
Looking good. Impressive height for the masts. Nice work!
-
What's on your workbench?
Onni replied to Gwyl Blaser's topic in General Ships In Bottles Discussion
Flipper 650DC made for a client.


-
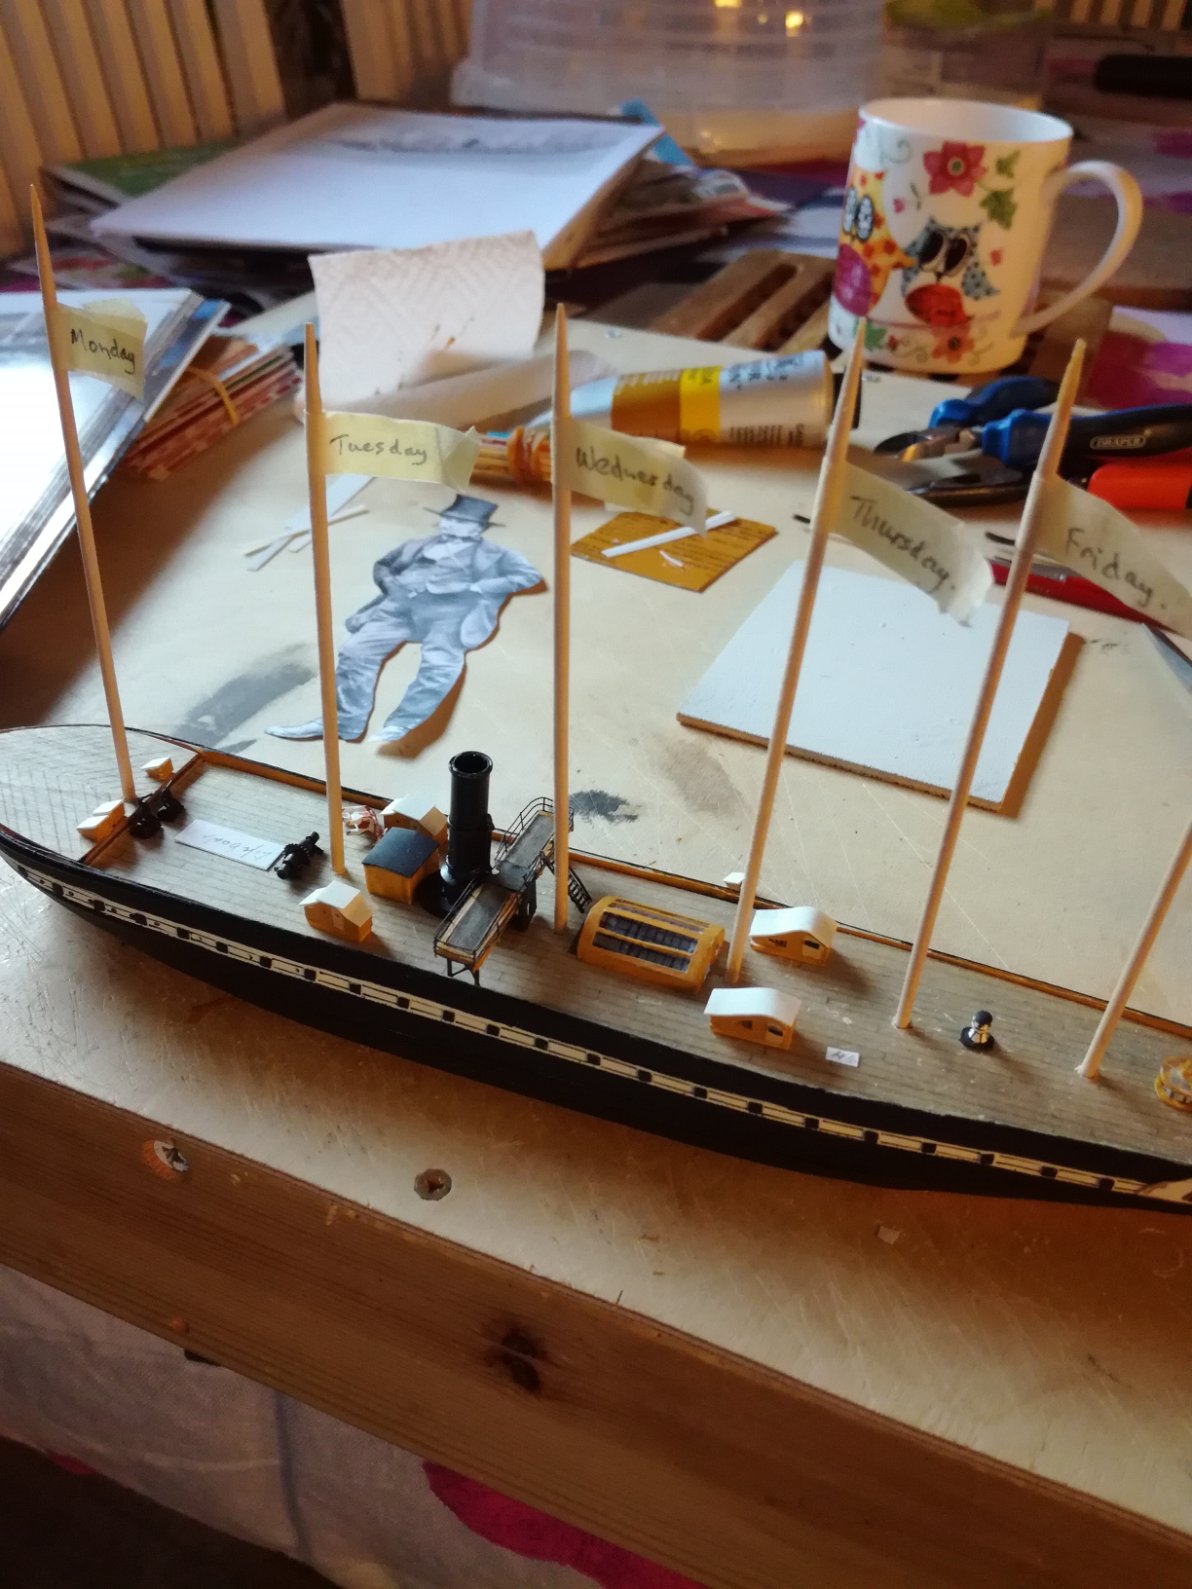
Funnel goes in and then the main mast. Decided to leave off 'Daisy' and the cow shed as I thought the deck could look a bit too cluttered.( It's possible that I can add them later if I want to.) Main mast in place with no problems and then set in the foremast. The bowsprit gave me a few problems as the glue didn't set on the first attempt because the mounting hole inside is made up of a plastic and wood wafer construction, so in the end I used an epoxy glue to fix it firmly. Finally completed GB after several months work but unfortunately I didn't notice that the top flying jig rigging had tangled at the top of the foremast until it was too late (everthing glued!) so there it sits; slightly down from the top of the mast.Slightly disappointing but these things happen in our hobby. The stand is a tribute to Brunel which incorporates a bridge,a tunnel,the Great Britain and of course Mr Brunel himself!


-
I can understand your reluctance to fit it into that nice bottle that came with the kit. I think you've made the right decision to set it in putty in the wooden case. Should look great!
-
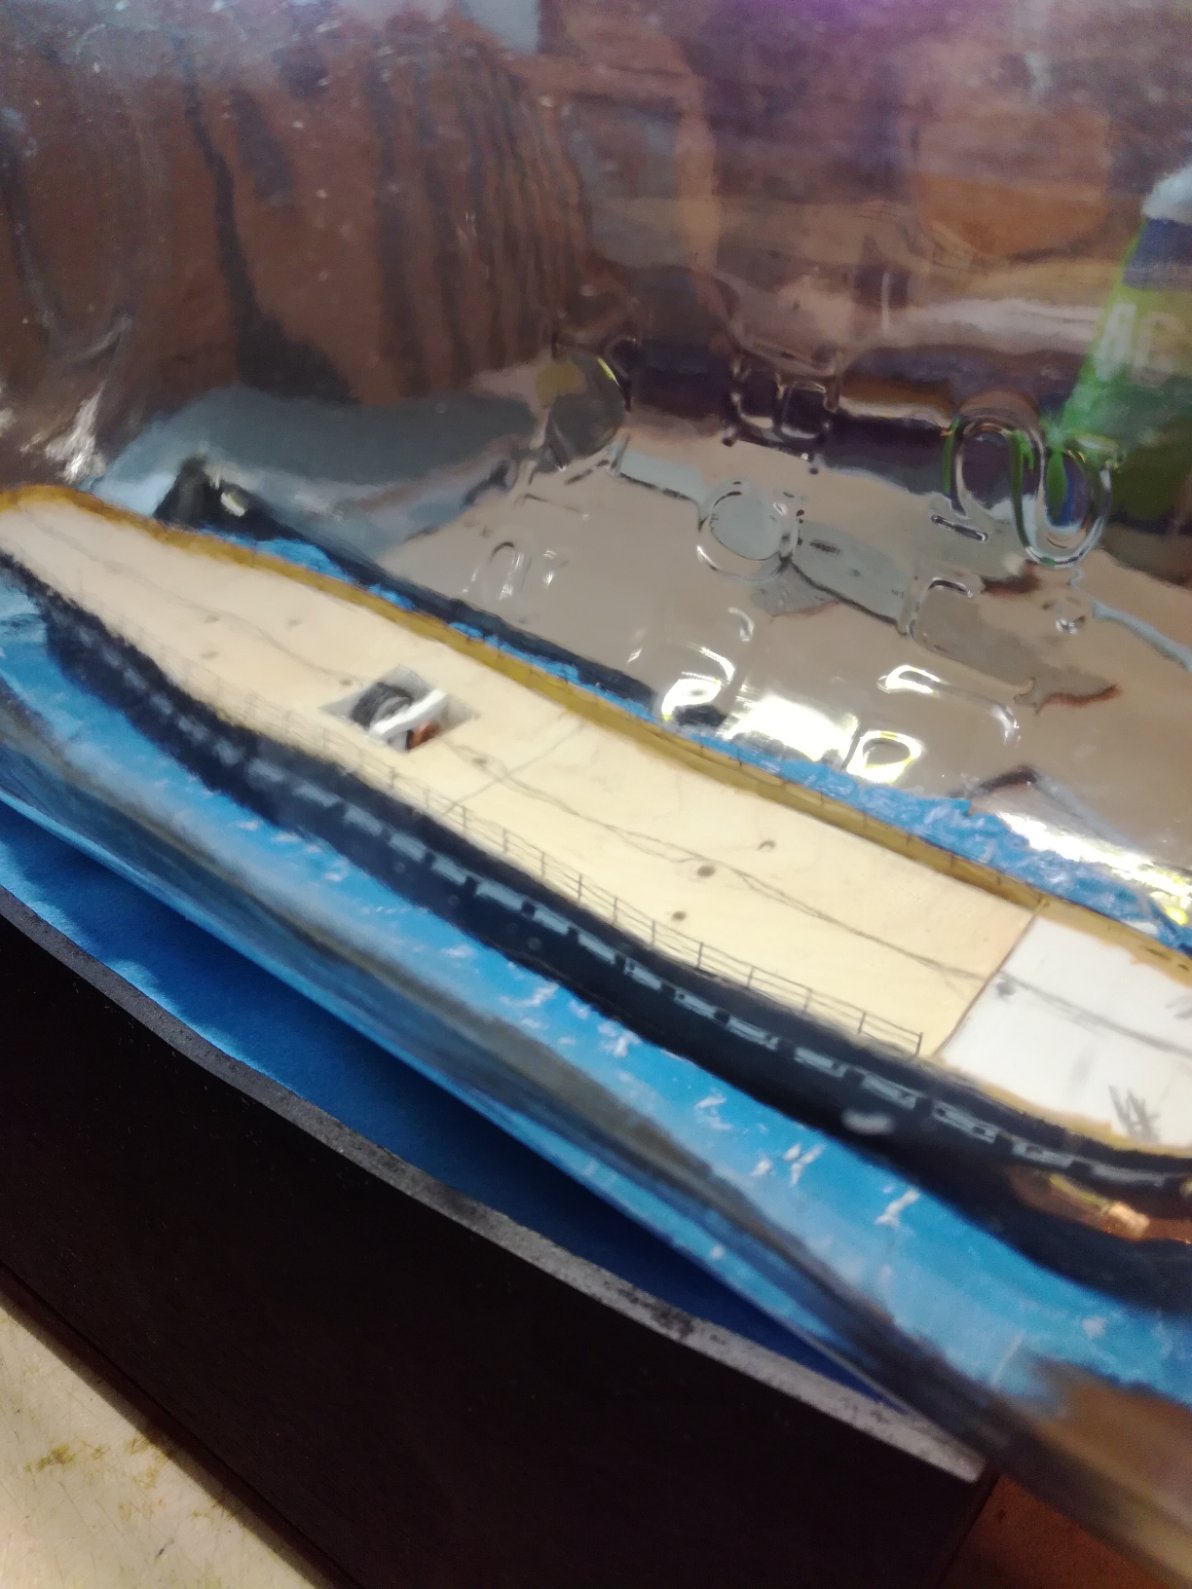
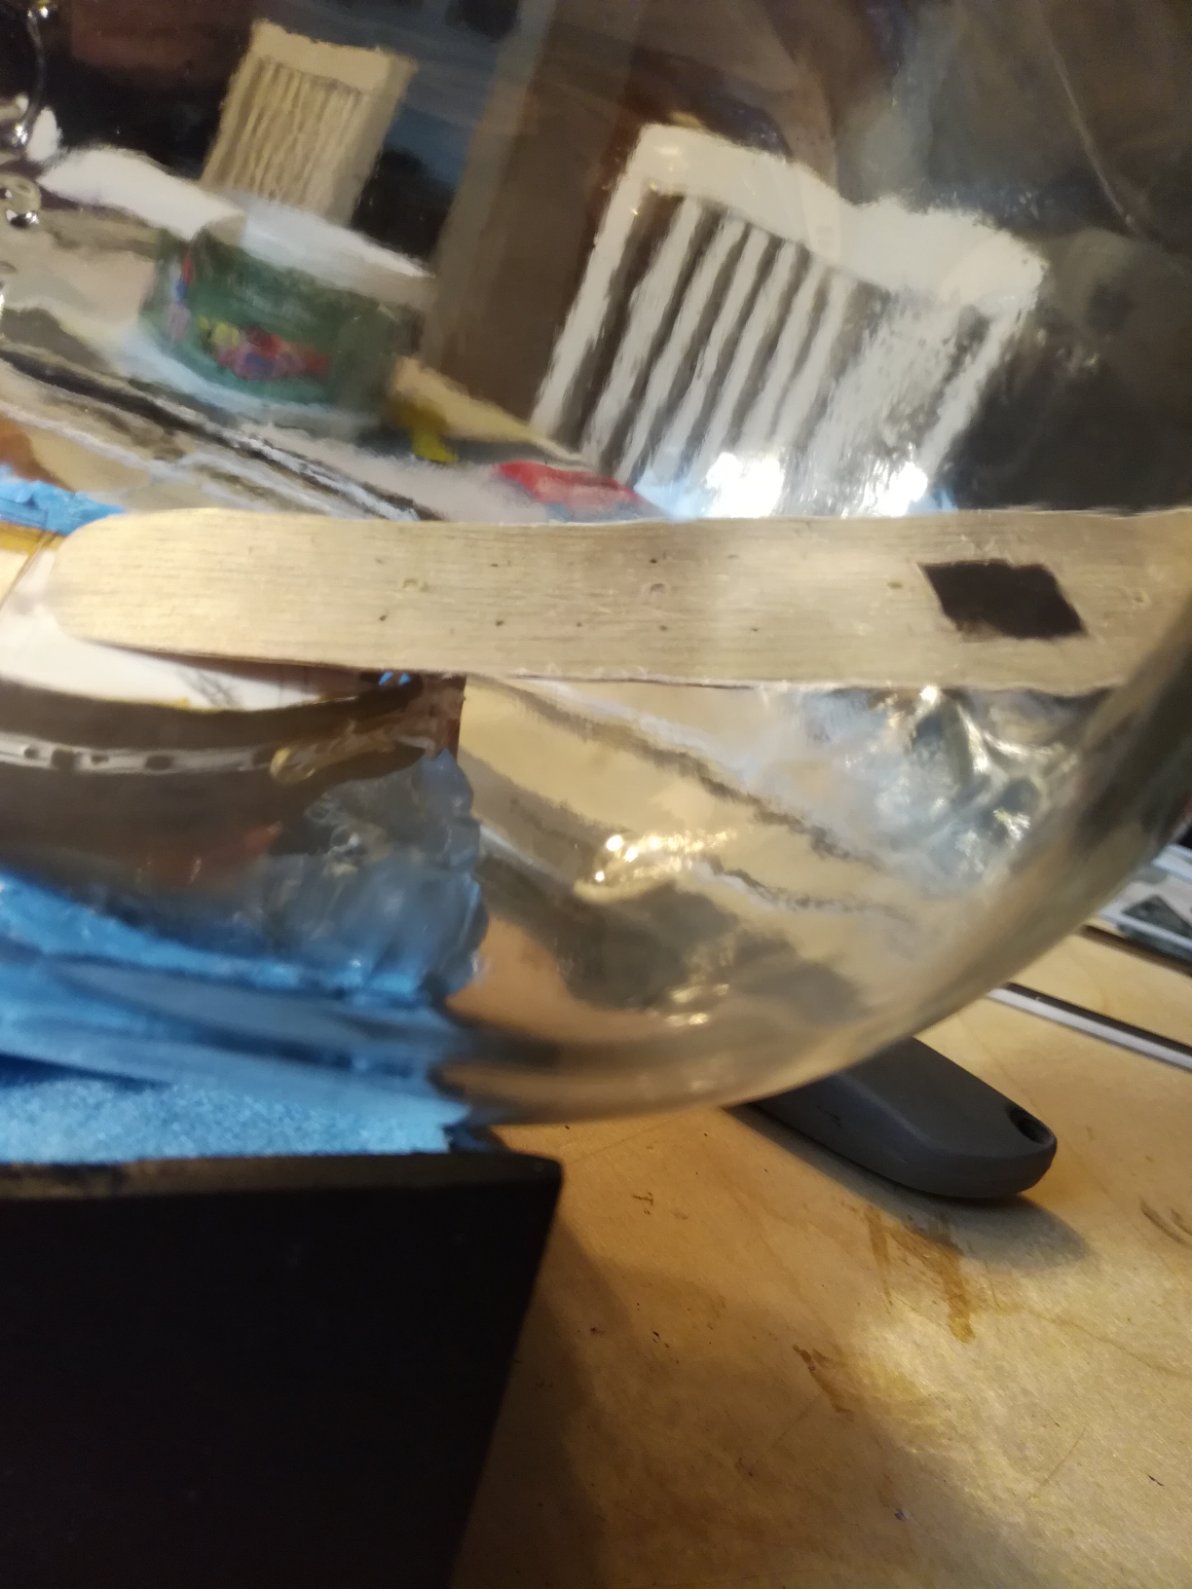
All the hull parts fitted through the bottle neck relativity easily but I had tremendous trouble to lift the front end of the starboard top piece over the front lug to secure it (Second photo). It actually took me about an hour before it snuggly slipped in place (Third photo).Luckily I had already designed these pieces to fit together without being glued otherwise it would of been a disaster had they had glue on them. As you can probably see some of the fragile photo etched railings received some damage in my struggles but they are pretty easy to repair. I then put in the engine room and then squeezed in the deck after making it pallible by pouring boiling water over it and quickly drying it with a towel before insertion, so the deck is in one complete piece. Mizzen mast and spanker were difficult to reach.From the front of the bottle to the mizzen point is about 17 inches/43cm so I used a long grabber which worked just fine. The other deck items go in easy and are glued in place. Lifeboats were a bit tricky but stayed in place after fixing. I'm happy with how the engine room skylight turned out; with which you can actually look through it, down into the engine room.


-
Yeah, I can thoroughly recommend the book Will, it's what got me started on this great hobby.
-
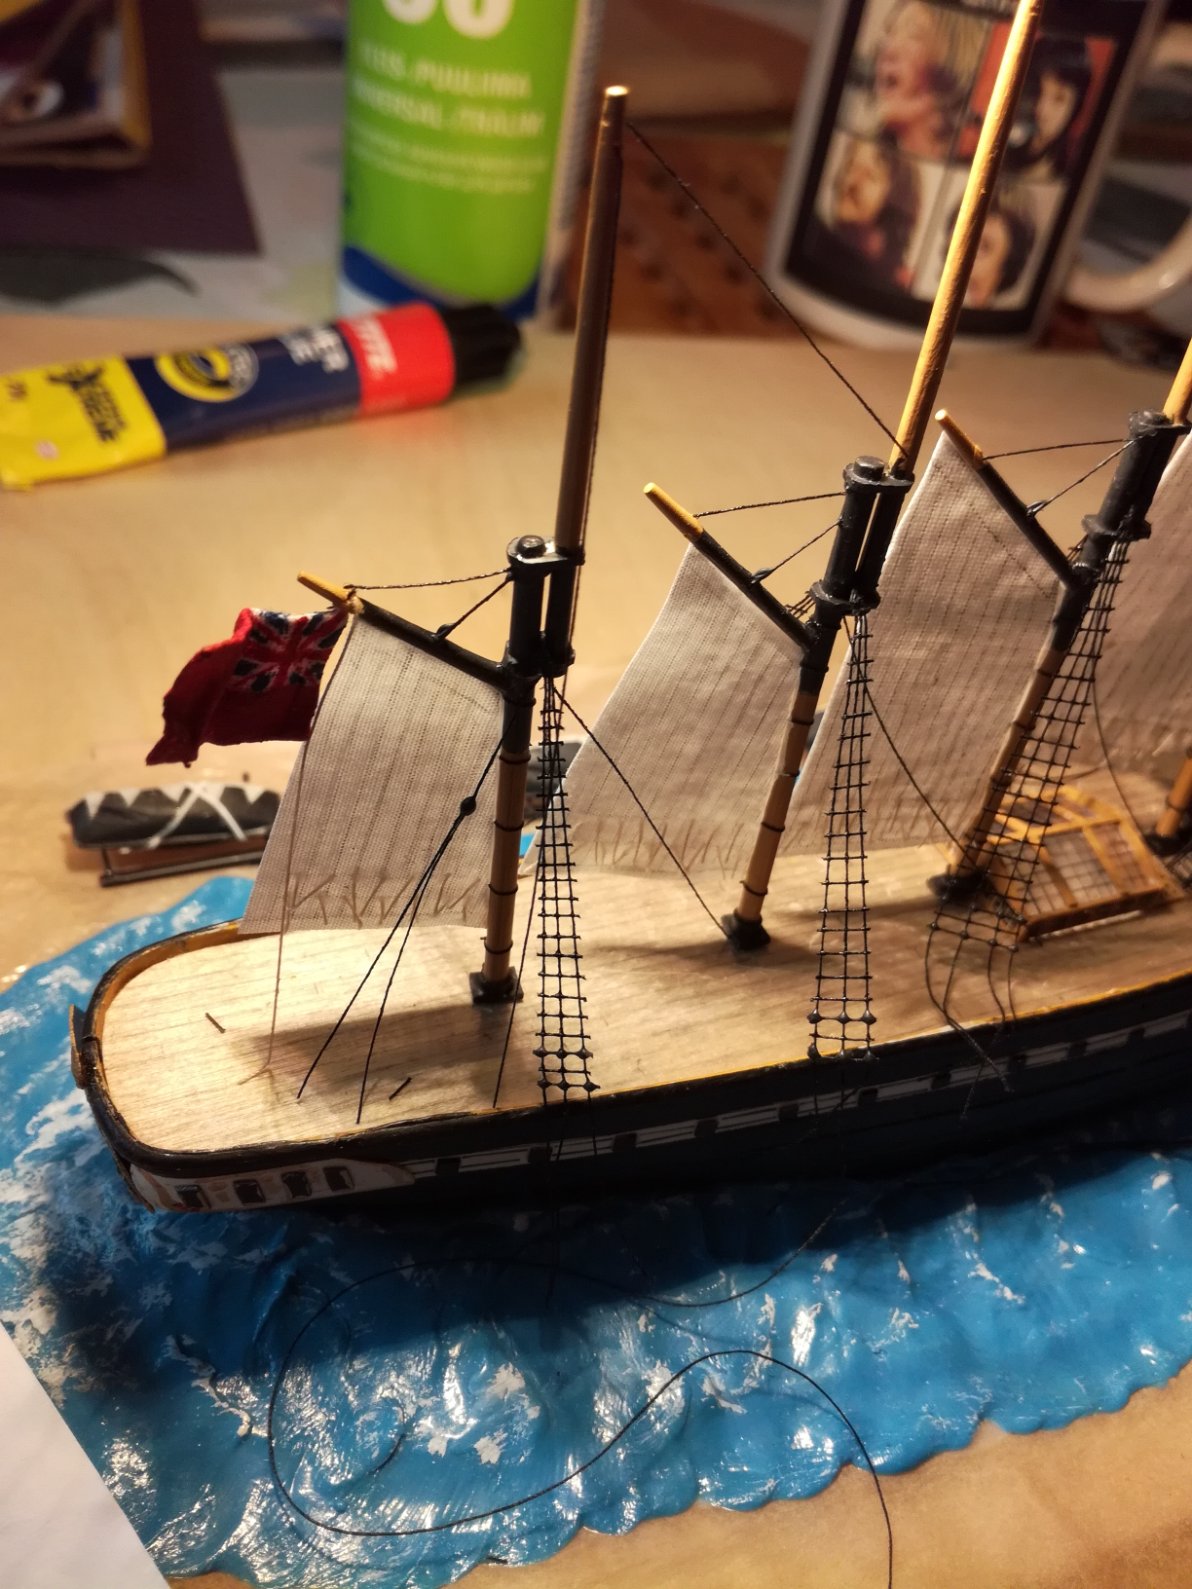
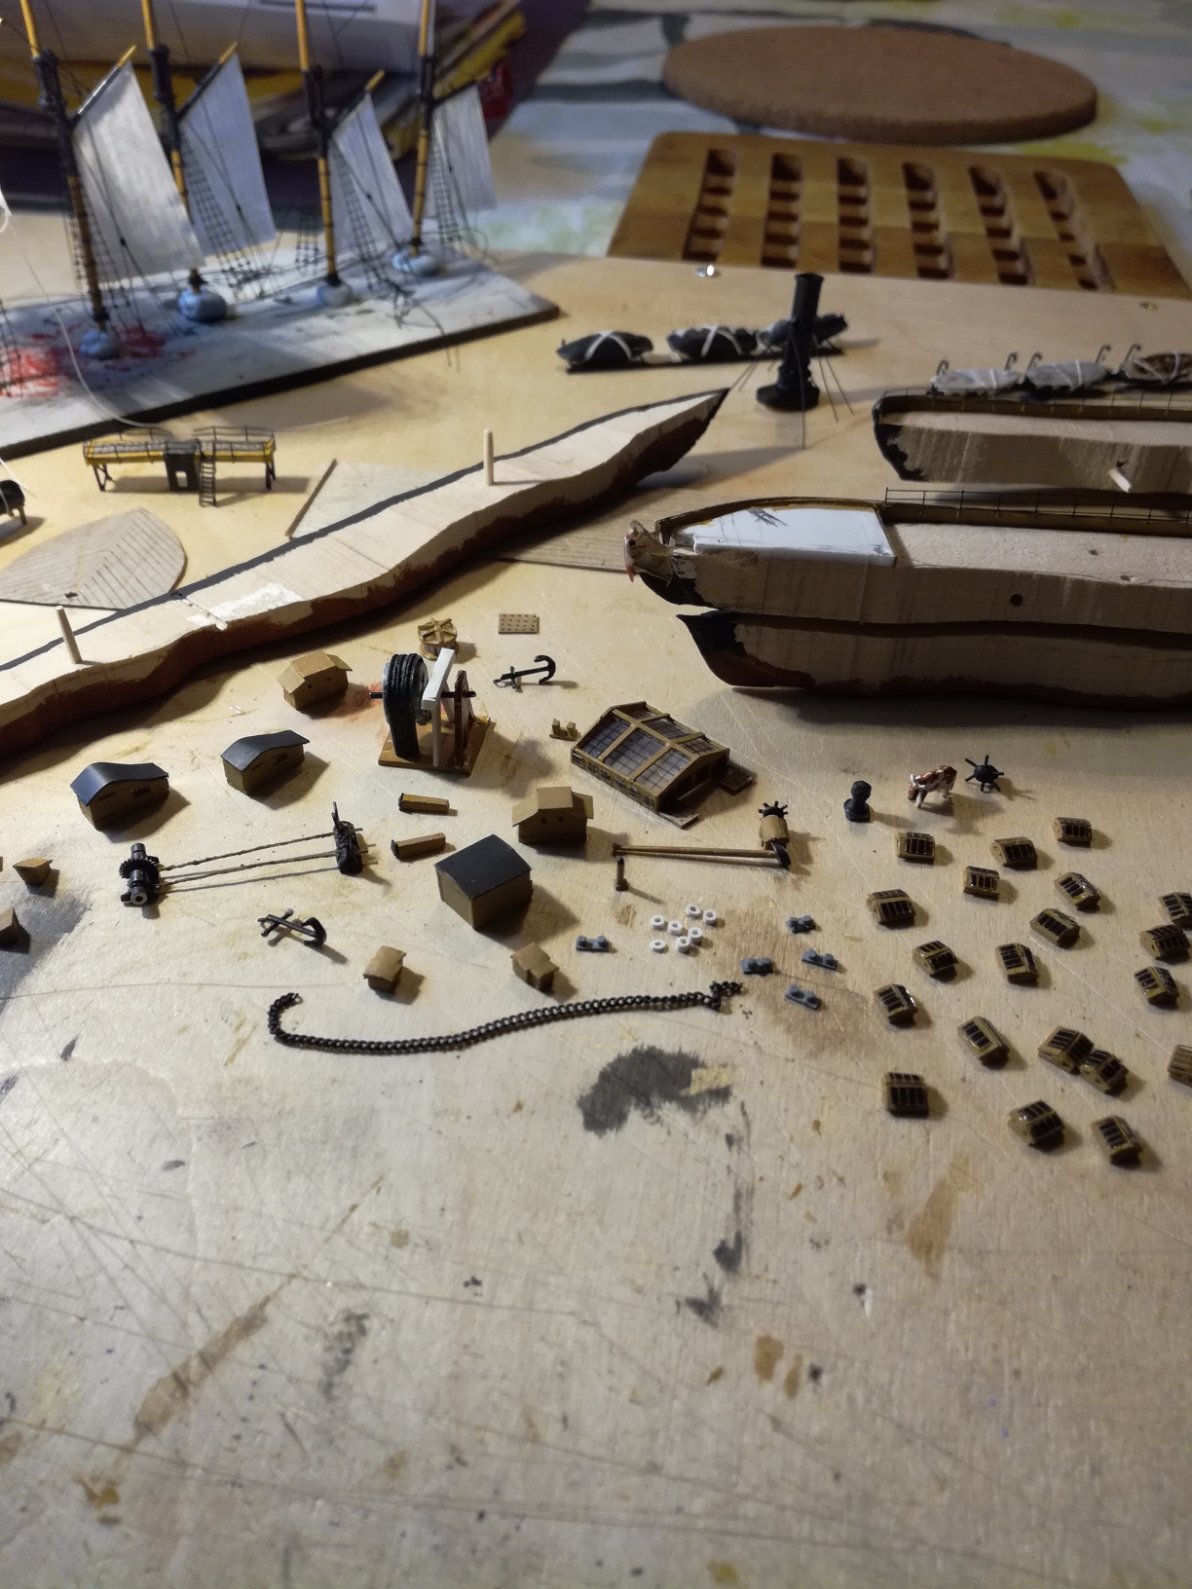
For some idiotic reasons after I had glued the main sail, it went into an inverted curve (looking like the wind was blowing from the front)The solution;I scrapped off the sail and re glued it the other way round so it now has a nice curve without even me trying anything high tech to get it looking like that!Constructed the lifeboats and all six are fixed (three each side)to a thin plastic strip which will then have to be fixed to the side of the hull of GB when she is inside the bottle.Made the 'red duster' flag from an old hankerchief of which I have inserted and glued very thin wire inside of it so it looks like it would be fluttering in the wind. Last picture is all the pieces wating for the big day!


-
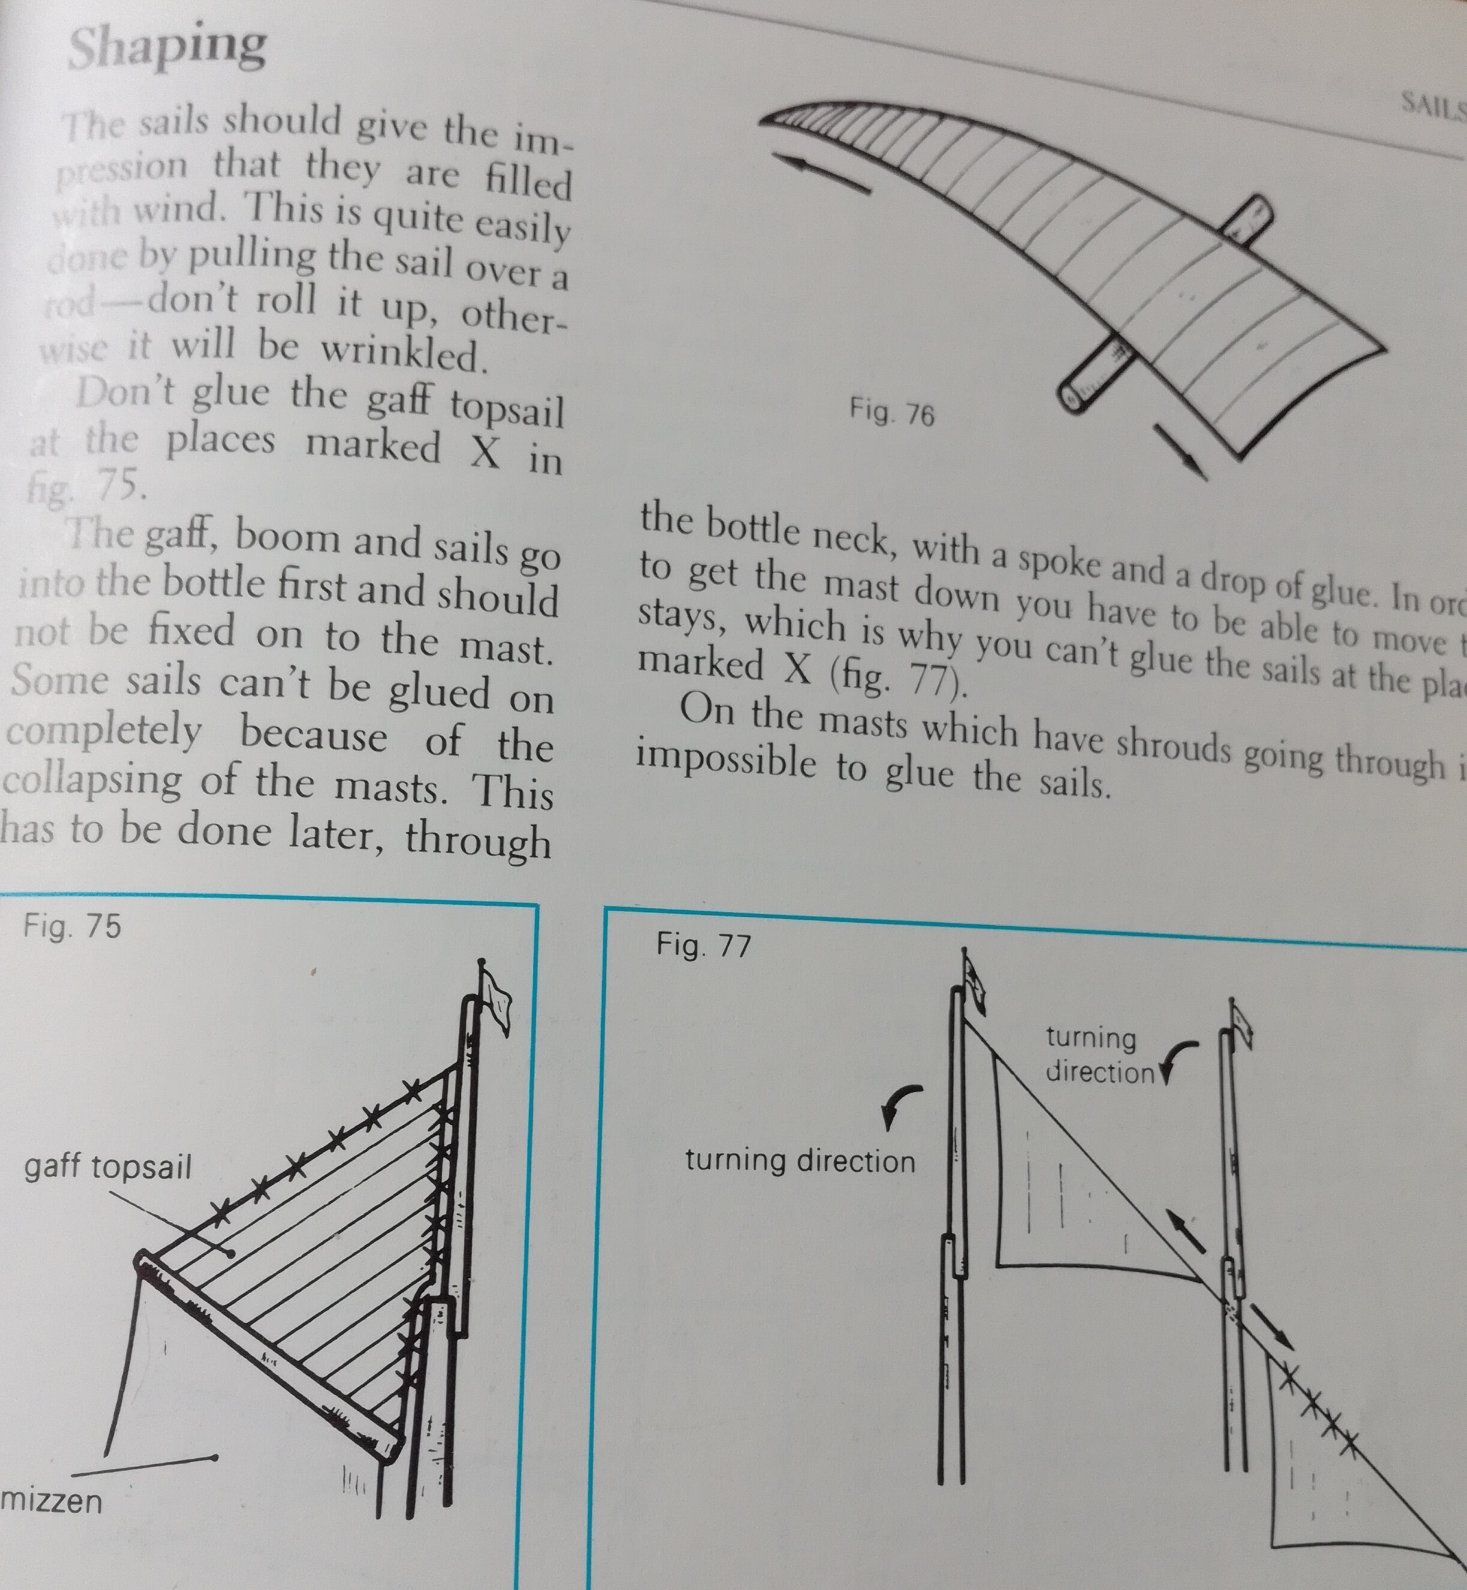
I'm not sure if this would help you Will;these illustrations are from 'Sailing in Glass' byJOOP VAN SCHOUTEN and explains where not to glue the sails until the masts are pulled upright and fixed inside the bottle.Pretty much the same applies to your main sail,only glue one end of the sail to the gaff;you can then glue the other end of the sail later on, inside the bottle; perhaps using a piece of wire, with a dab of glue on the end of it. I usually use ordainary white wood glue to fix the sails.


-
Completed all deck furnishings (the small skylights took ages)and moved forward to the masts and rigging. I am going to rig her with half sails up but no top sails as per the drawing at the begining of this build. As you may of noticed I made a new engine room skylight and cut out the space in the hull so that you should be able to get a glimpse of the engine room machinery through the skylight.Shrouds and ratlines I make on my little jig which are bonded with super glue and white wood glue to simulate the block and tackle.


-
Continued with some of the deck features.'Daisy' the Guernsey cow with her cow shed amongst other items. The two Trottman anchors are made out of wire and plastic.Not happy with the engine house skylight so I will probably make a new one.


-
Time for some bling.I actually hate that word but it's probably a good description for all the golden stuff that adorns GB. The trailboards illustrate the artisans work on the ship but is very difficult to reproduce on such a small scale. I cut shards of plastic and then painted them gold to try to imitate the scroll work. The Lion and Unicorn support the royal shield under the bowsprit;they didn't work so well for me as I coudn't detach them from the grease proof paper without cutting them out with scissors.Fashioned a couple of catsheads,they will be fixed later. The stern is made out of three pieces of thin plastic ,painted black and then;with wood glue, I fashioned the decorations so that when it was completely dry I could paint the raised areas gold. I'm happy with the result. The last photo shows the hull cut vertically. It is cut horizontally as well (altogether four pieces) but I forgot to take a picture. I'll try to include a shot of that later. Everything lined up pretty well after the dissecting and thats because all the pegging holes were drilled before cutting up the hull and not after.


-
Nice work so far and some interesting use of G clamps. I like that you are using scaled down drawings of Bluenose, it's much easier to get everything the correct size. The one thing that I find with painting,is that it does show up any inconsistencies but sometimes that depends more on the colour of the paint. Keep up the good work!