Onni
-
Posts
464 -
Joined
-
Last visited
-
Days Won
203
Content Type
Profiles
Forums
Gallery
Events
Everything posted by Onni
-
In my haste to start putting her in the bottle I forgot to take a picture of all the components(pieces)that go to making her up. Oh well! Start with the port side because I know it fits alright because it's narrower than the starboard side. Pieces fit together well and I'm not even going to glue them because the rest of the hull and decking will hold it all together when they are glued.(I hope).


-
Very,very nice. Love the bottle clamp as well. Fantastic idea. Finished item looks great!
-
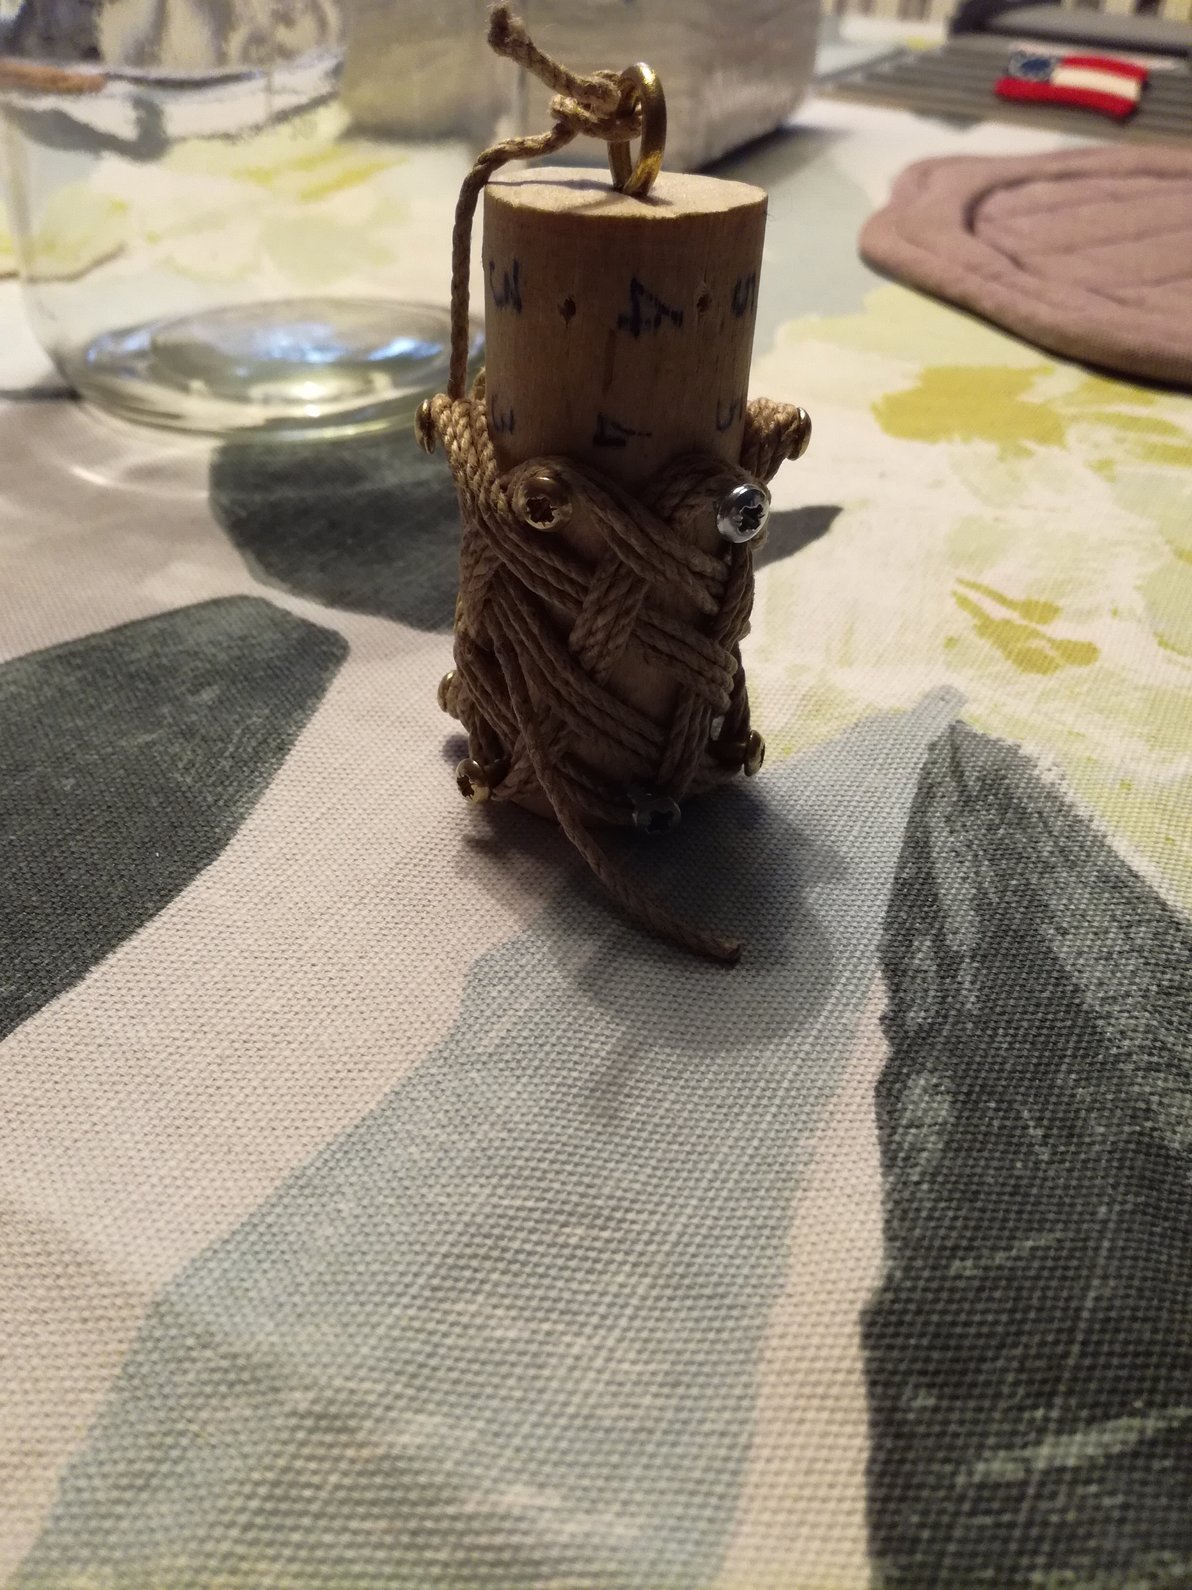
Bruce: just like to add that the twine,string,rope or whatever you use for your Turks head needs to be quite long; maybe up to two meters long. Better to have too much than not enough.

-
I would recommend making the one on the left hand side that has six screws on either side and offset numbering 1-6. This will give you a turks head with up to at least three weaves as per the one in my own picture. Diameter of the wood of course depends on your bottle neck size but the turks head can be adjusted for size after you've completed it. I would say perhaps the diameter of a broom handle and maybe around two and a half inches long will be sufficent. Hope this helps.

-
I did not come up with this jig Bruce.Sorry to say that i'm not that clever! I have lifted it from the Swedish ships in bottles web site. I think I posted a link to it before but anyway here it is again : http://www.flaskskepparna.se/bygga/bygga valknop.htm It's not that difficult to follow the instructions, as the pictures really are pretty clear and easy to follow. (Don't ask me to translate!)😎
-
Having a break from ship building;made a Turks head for the bottle using my trusty jig.About half an hours work (for me) to make.

-
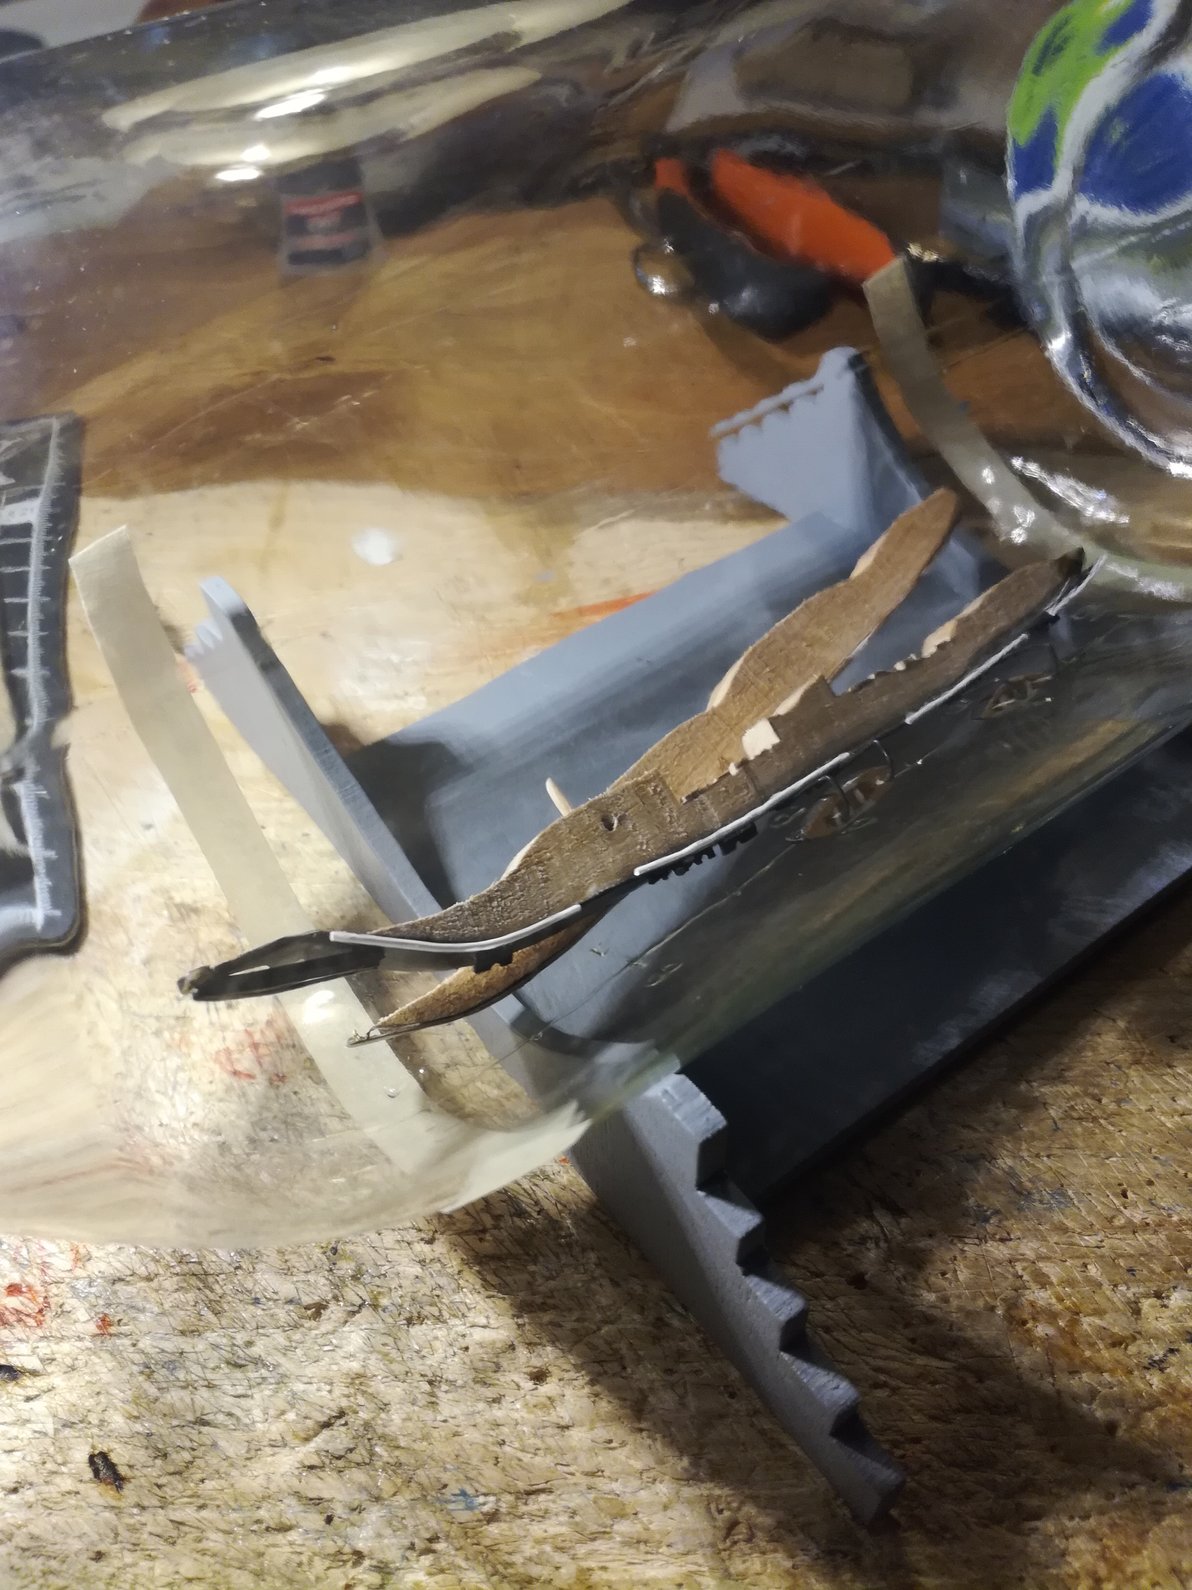
There is no way the hull is going to go through the bottle neck with the lifeboats protruding so much, so I have had to cut away more of the hull down the centre line to stand a chance of getting her in!

-
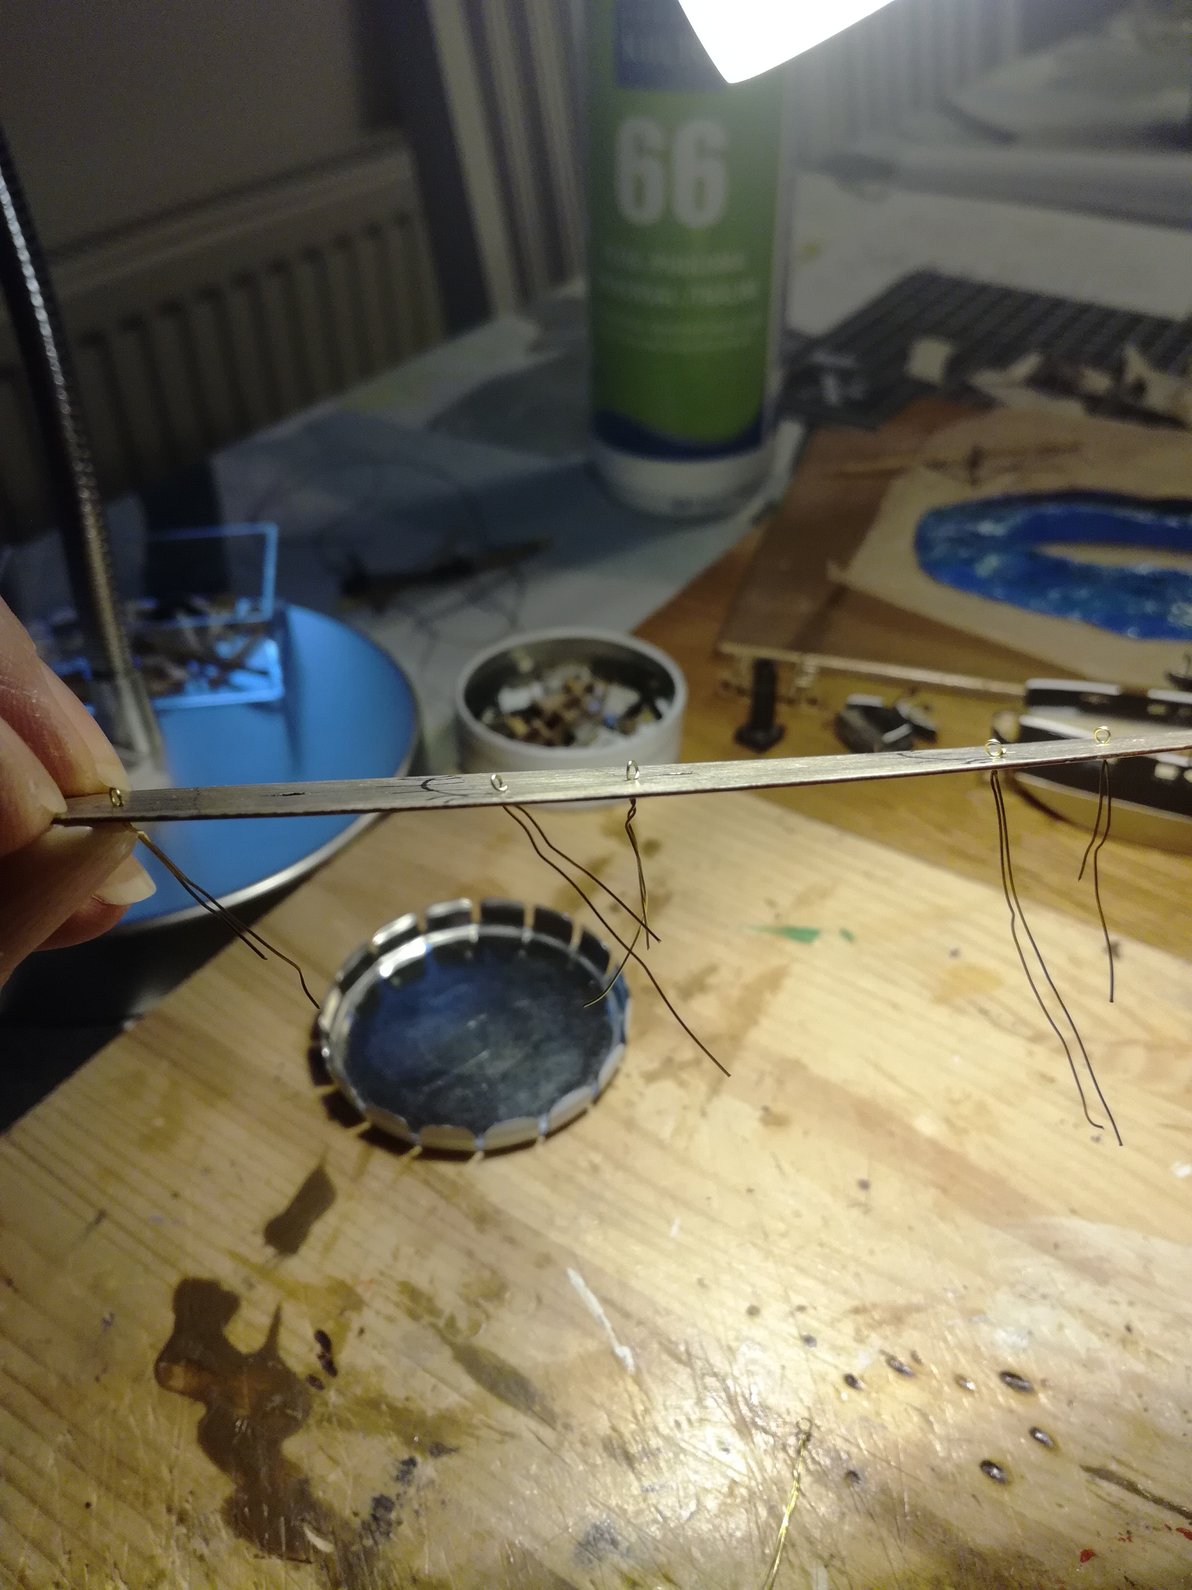
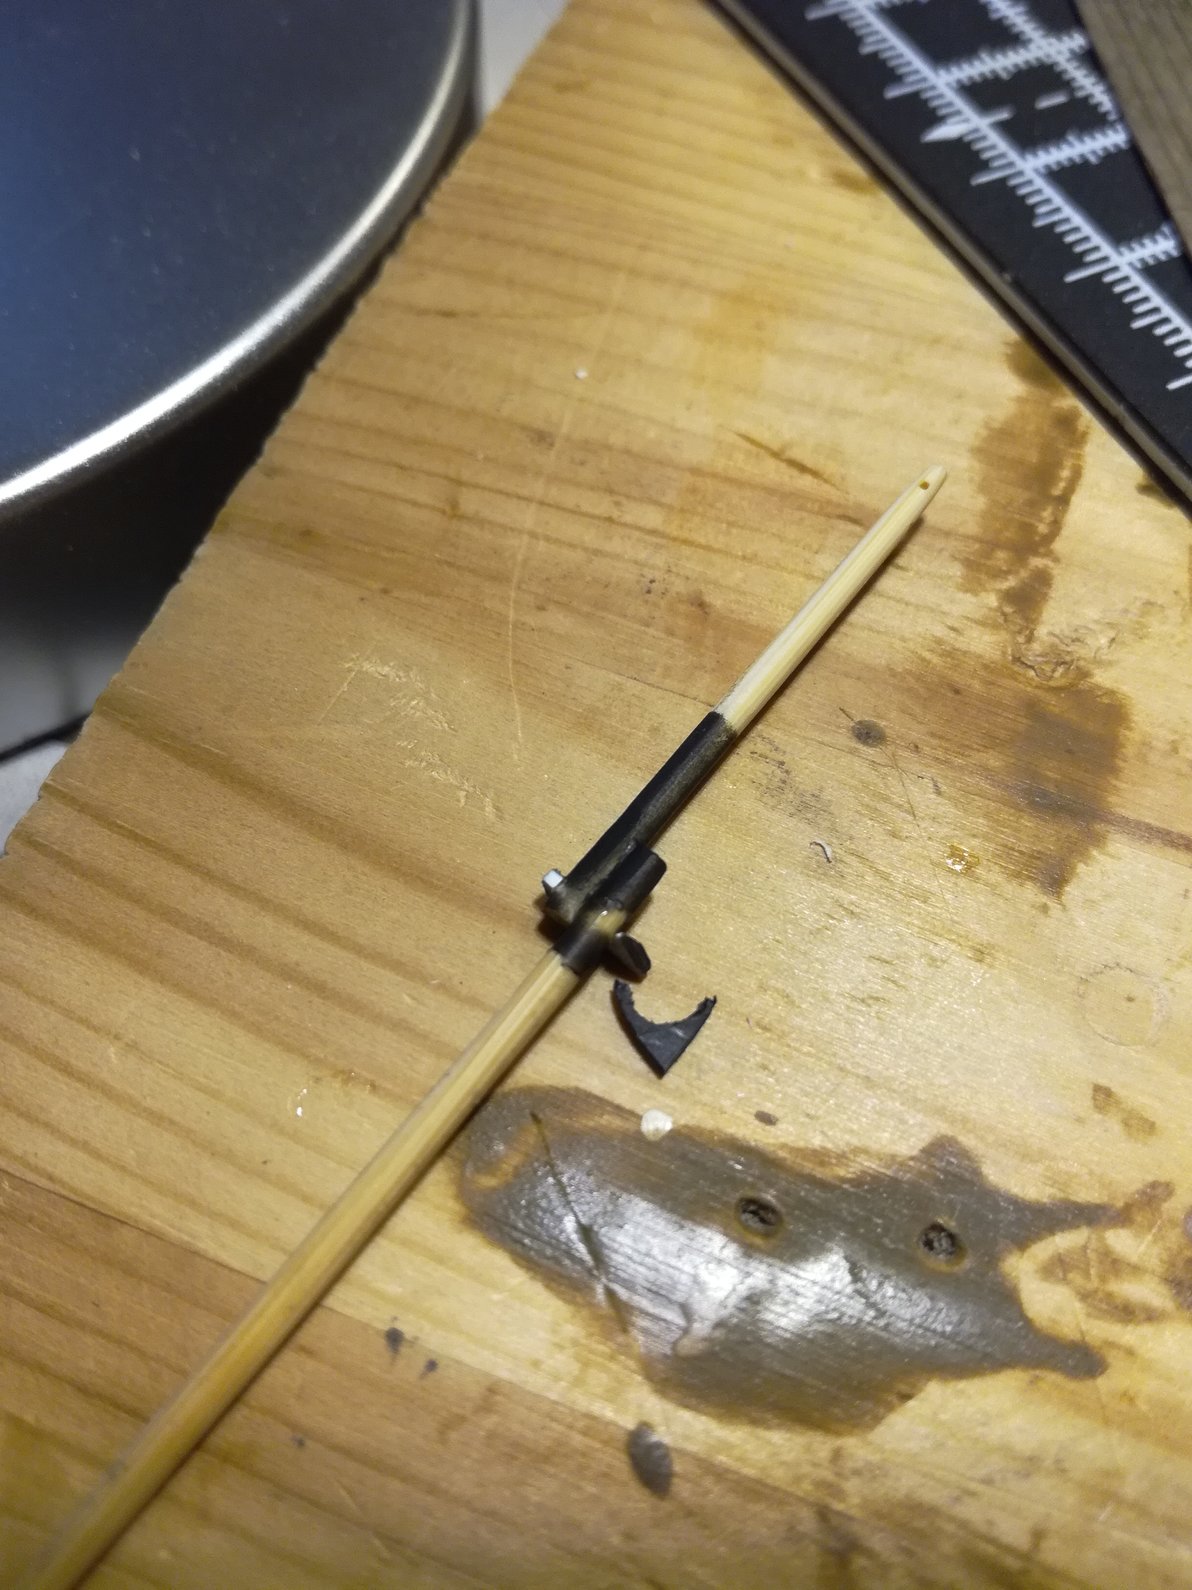
Just remembered to make some 0,3mm metal loops for tying some of the rigging too. Snip the ends off as short as possible under the deck and superglue. After the glue has dried sufficently I sand it down as much as I dare so when it is fitted back on to the main hull the decking will be hopefully fairly flat.


-
Glued the sails in place. Managed to get a nice shot of her in the morning sunlight. Bridge structure completed as well as all the deck items that I'm going to use,so I guess she's about ready for her new berth.

-
Very nice work Mick. Looks great.
-
Hi Bruce. I use an epoxy resin glue which is in two different tubes which when mixed together produce a chemical reaction to form the actual glue. Have to work pretty fast when using it because it goes off fairly quickly. Regarding the sea I usually fold it in on itself so that none of the sticky plasticine is actually touching the bottle when it goes in. If it does then I wipe it off with a lightly damped tissue or cotton wool. I'll try to remember to post pictures later.
-
The 'sea' is made from plasticine coated with white wood glue and left over night to dry. Next day I paint it with acrylic paints and allow it to dry. Drying time is quite fast so then I give it another coat of wood glue which dries to a nice glossy finish. The underside of the plasticine is untouched so it will stick fairly well inside the bottle but anyhow I intend to insert and glue the hull down first and insert the sea after, so in a way the hull of the ship is not reliant on being squashed into plasticine to hold it in place. I will have to cut the 'sea' in half to get it through the bottle neck and then join the two half's together around the hull of the ship.

-
Welcome aboard New sailer.
-
The stand has evolved into this. I intend to place the name under the flag. Cut out the flag shape from plywood,sanded it down and painted it. Those stars were difficult to do! Mark on the flag is a reflection from the light. Font painting is a bit tricky too. I like to try to do everything by hand instead of just printing things out.(You can tell its hand painted😣)


-
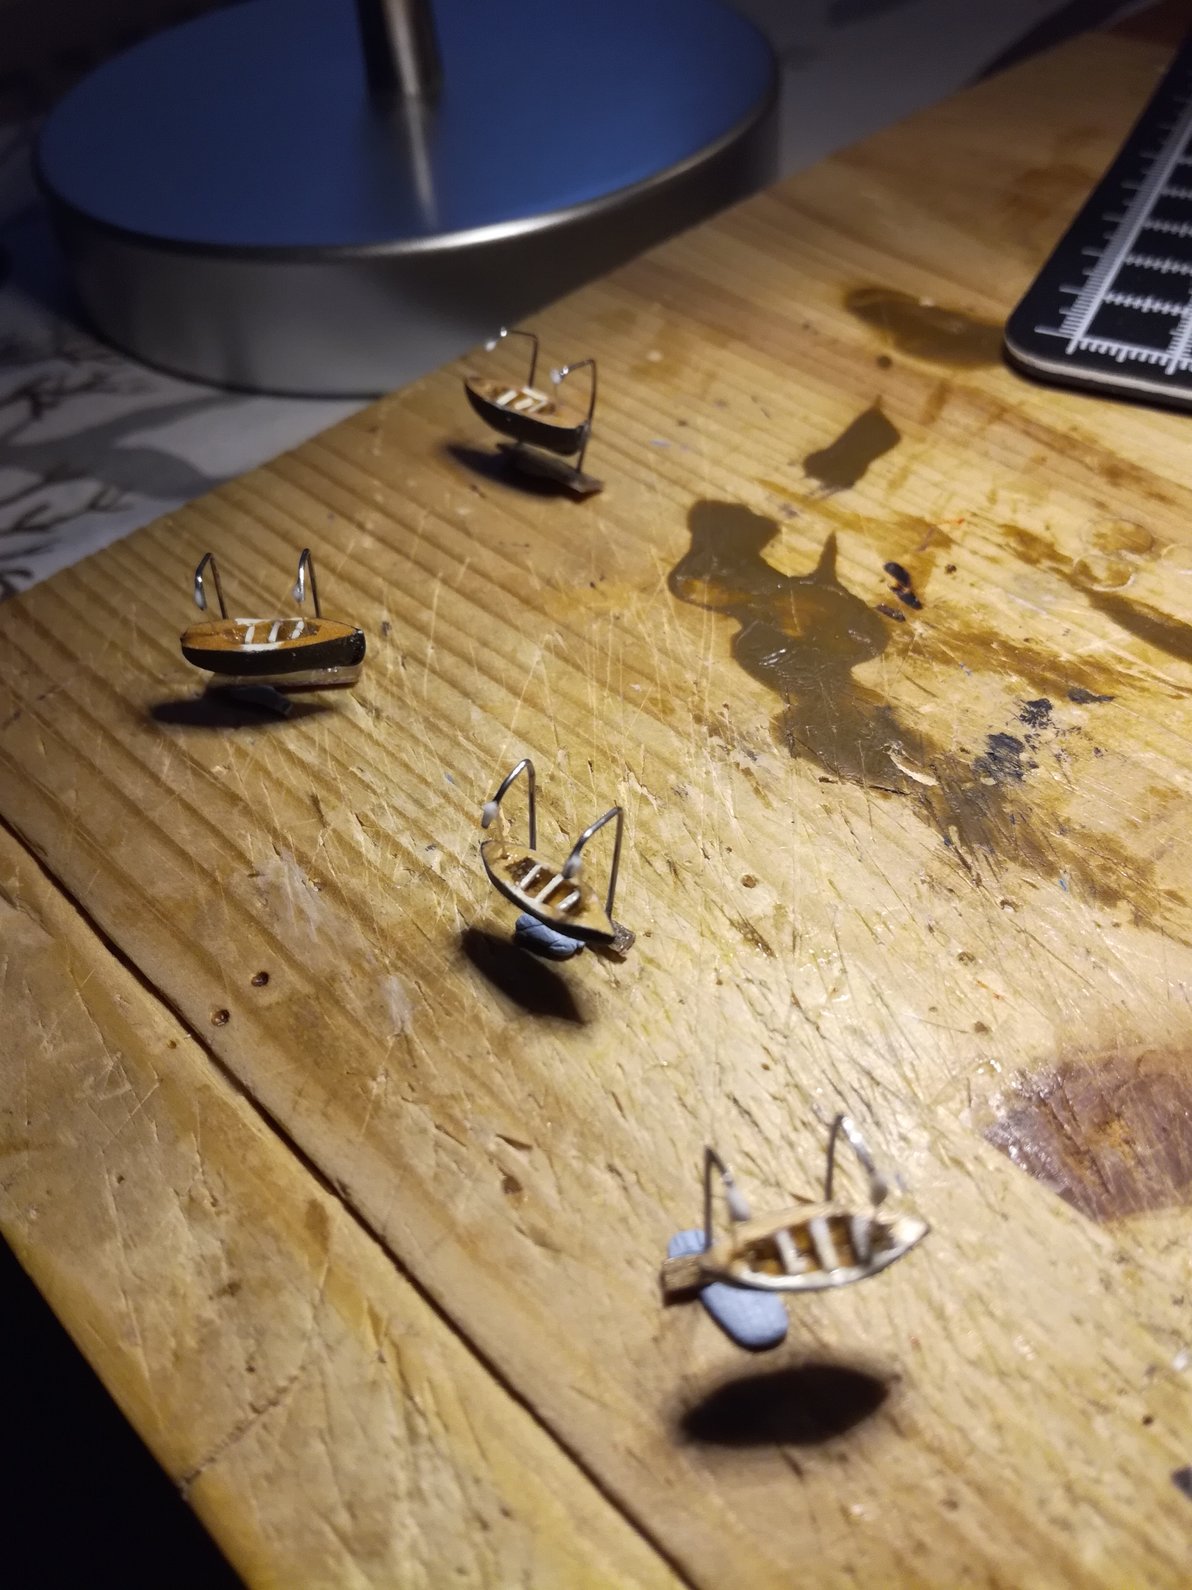
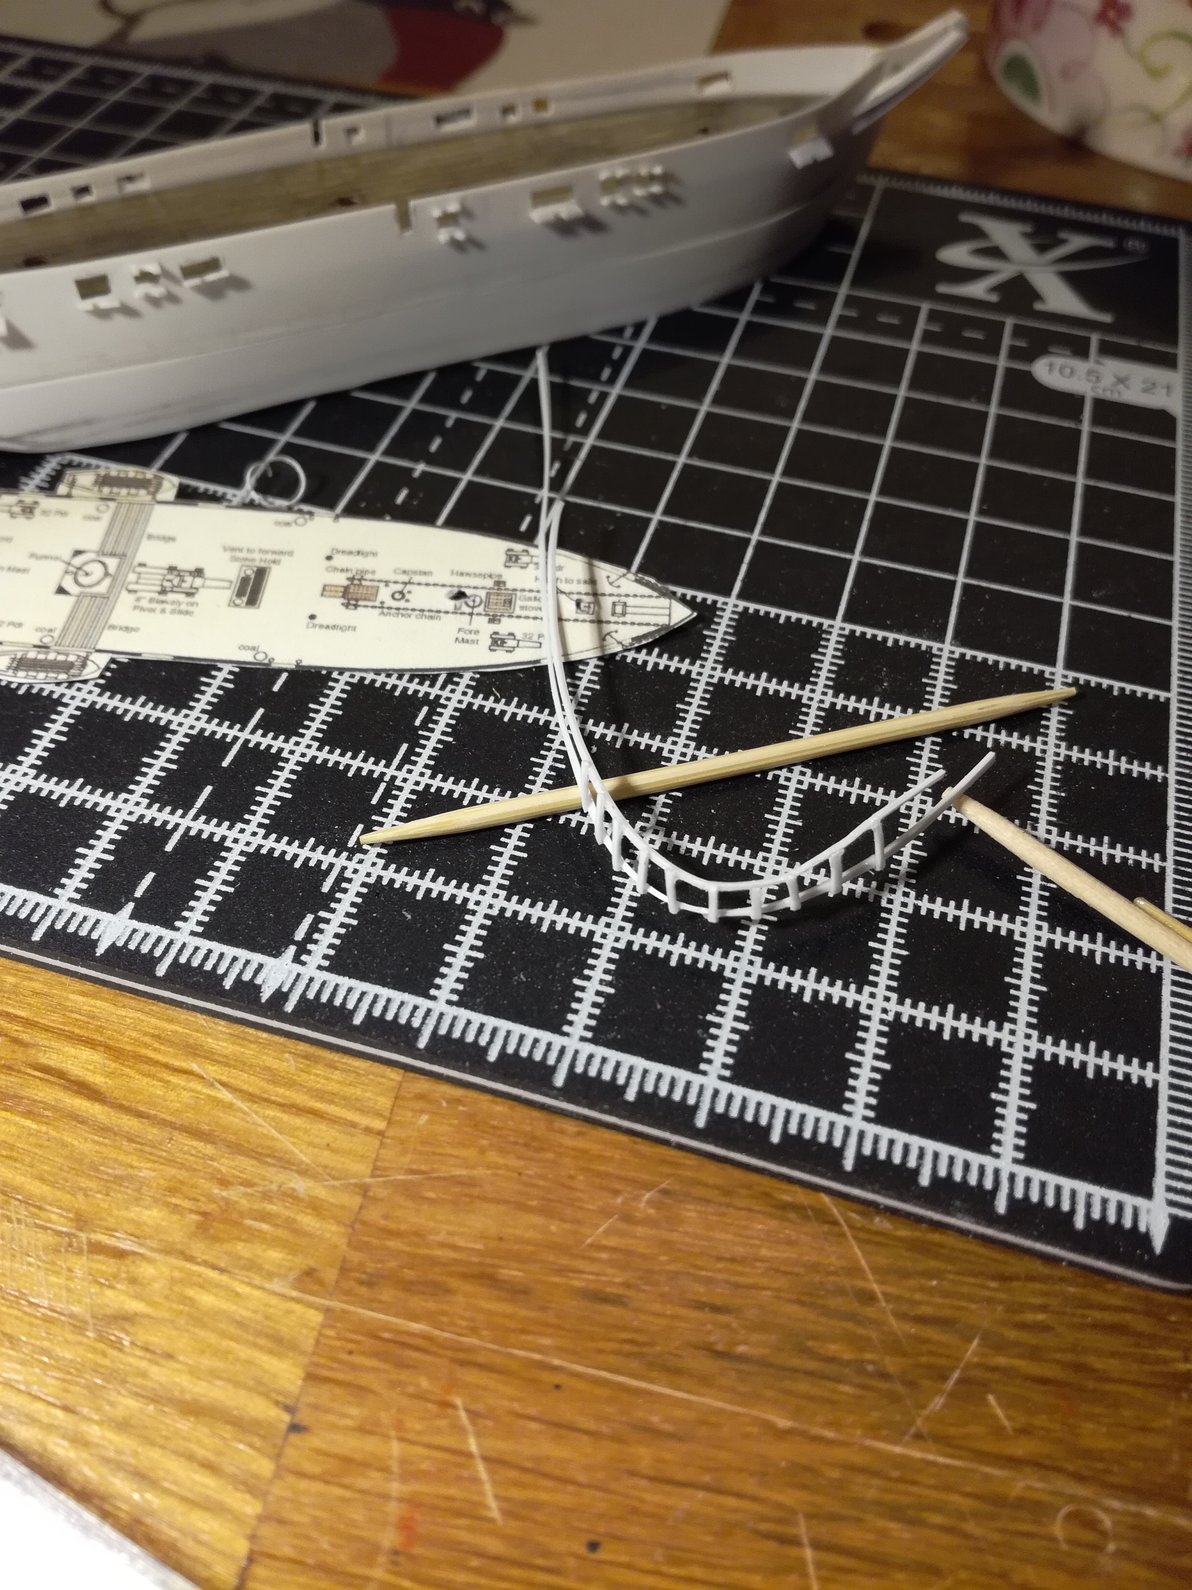
Continue with the making of some of the deck items.There are two large breech loading cannons of 110lbs and 68lbs(according to wikipedia) the larger one of the two is positioned between the mizzen and main mast.Fabricated some air vents but later on I thought that they looked a little bit too large for the scale of the ship so I will make some new smaller versions.Added a couple of pipes to the funnel.Making lifeboats is a chore for me;just carved basic shapes and hollowed them out with a drill bit which looks like a dentist's torture instrument. Davits are constucted using 0,3mm steel wire which is very springy.Later on discovered that I also made those wrongly as they should be designed to fix to the outside of the hull.(More about that later!) Built the bridge out of a thin gauge veener but it just looked too big and clumpy so remodelling it in plastic;much easier.


-
Thanks for the compliment Bruce. Ships from this era hold a certain amount of fascination for me ; the combination of sail and steam is enough for me to get suitably enthusiastic about a project and if it's a historic ship, then it's an added bonus.
-
The workbench,aka,the kitchen table!

-
Oop's,sometimes bad things happen. It's repairable though.

-
Time to do some painting. Looks a whole lot better with a lick of paint😉


-
Very intricate work. Looks great!
-
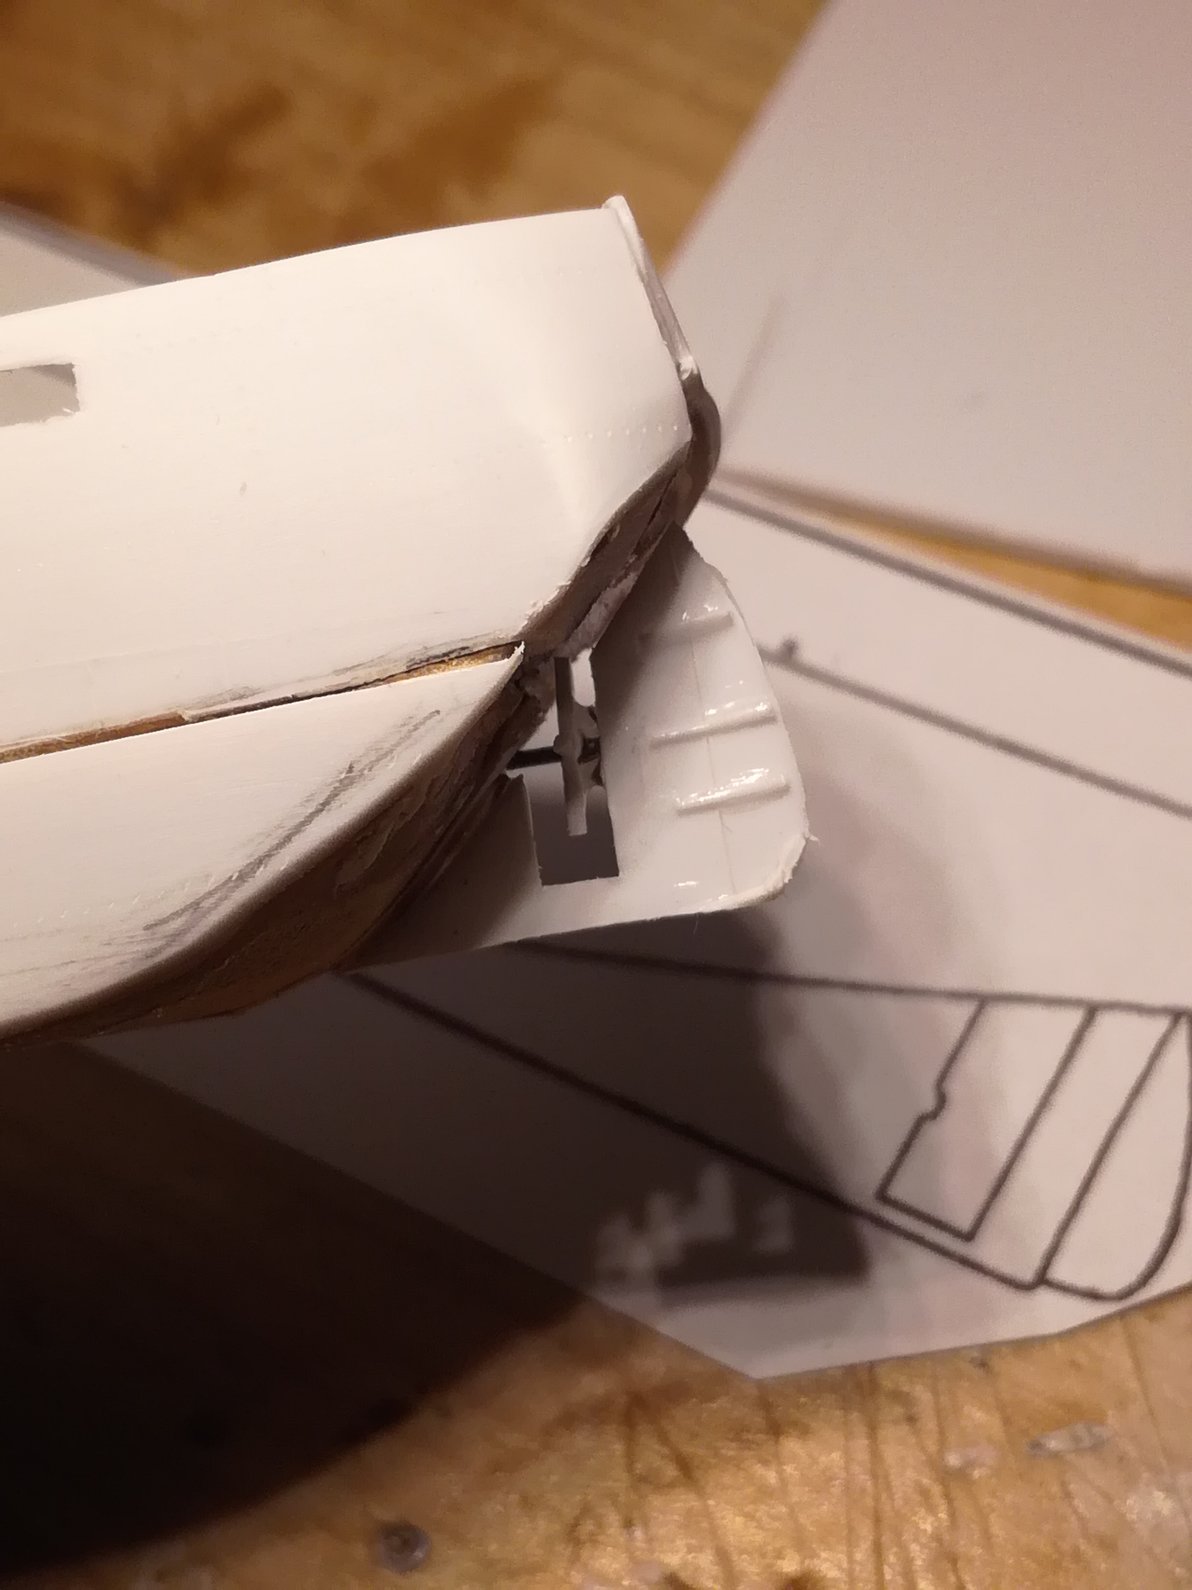
Managed to get quite a lot done on her this weekend.Cut out gun port doors from 0,3 plastic and glued them in place. That was a bit tedious! The stern was a problem;tried to form it in thin plastic but it was hopless (or maybe I'm useless)so I cut out a stern chunk from a thicker plastic and moulded it with thin stern bulwark and underneath with modelling clay.It dosen't look so great but when I've sanded it off and painted it, I hope it will look better. So now the stern slots in place. Worked on the masts and bowsprit just to get them the right lengths for the bottle. Tried a 3mm diameter brass tube for the funnel but it just didn't look right so I went with a 4mm wooden dowel which I will drill out an opening on the top later.


-
Not that happy with the joining of the hull in the middle so I cut away the bottom section,cleaned off all the old glue and replaced with a new piece of styreene. The aft of the ship looks terrible but I will attempt to redress that later on by some sort of method! Before anyone points out that the'Alabama' only had a two bladed screw and not a four bladed one like I made; I have already fixed that issue with a stanley knife😂


-
Really nice work. Congratulations.
-
Looks good to me! Nicely shaped hull.
-
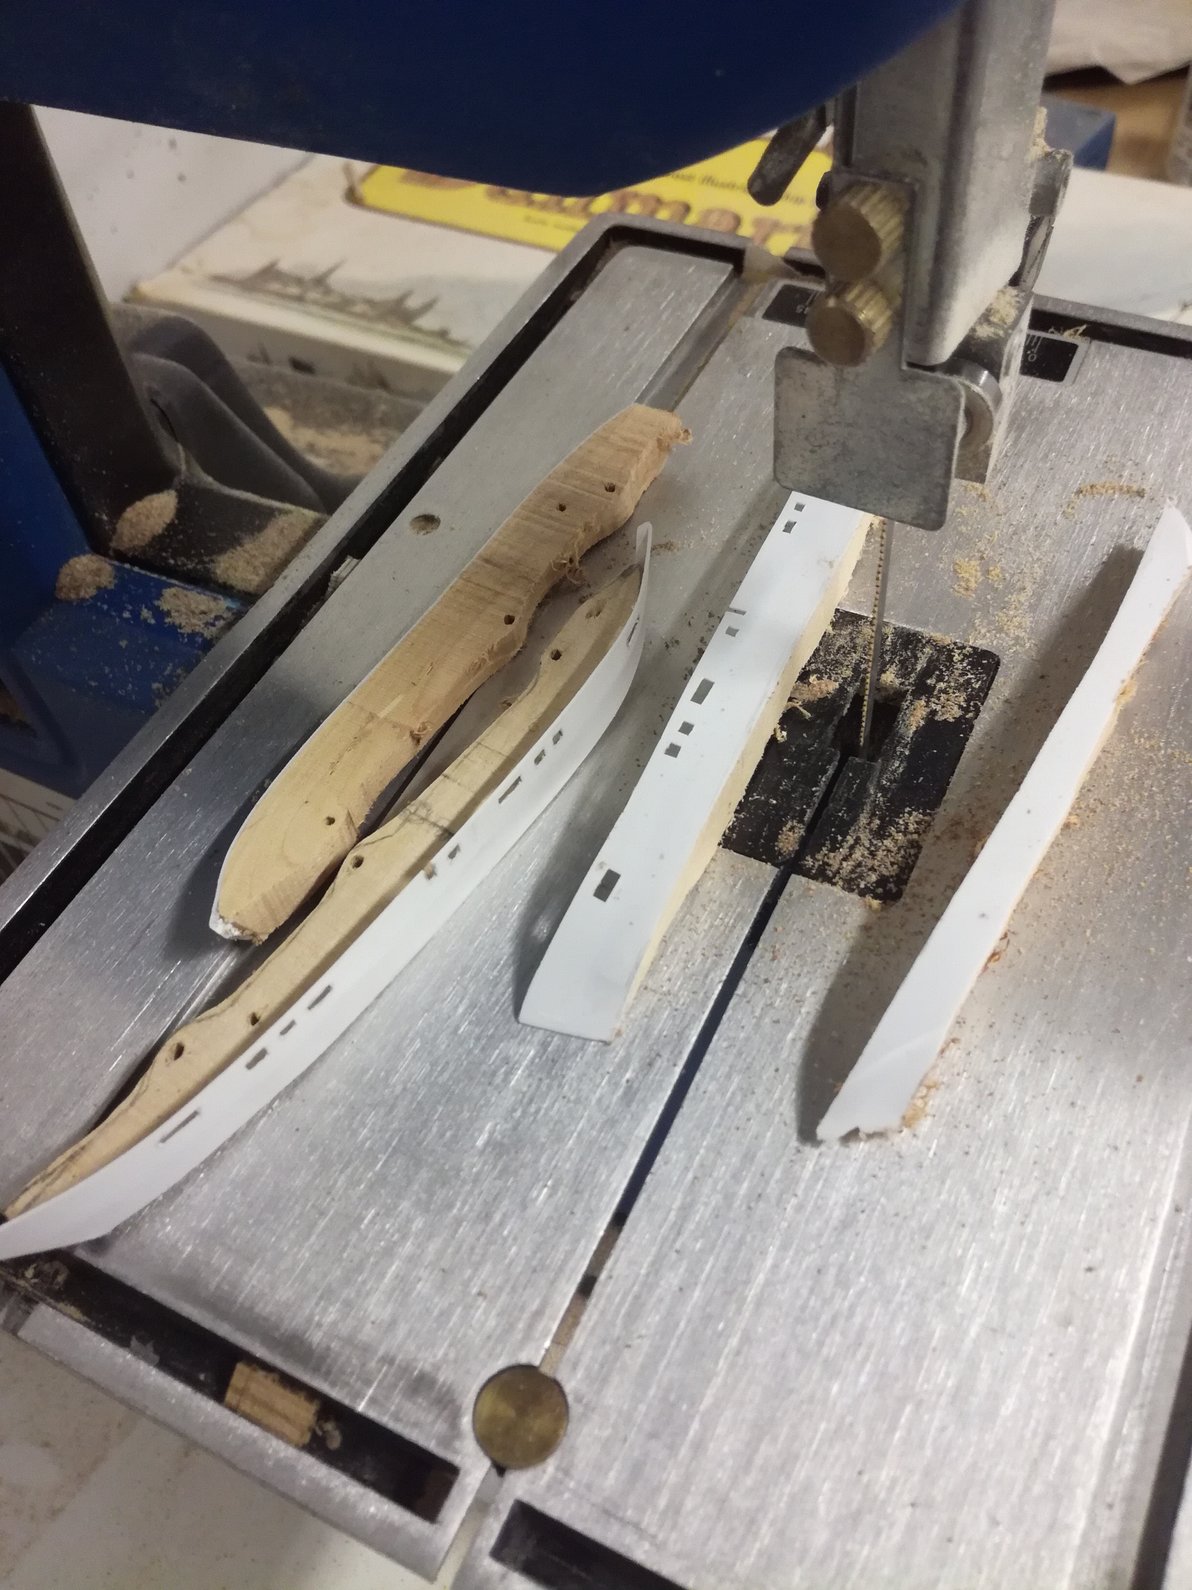
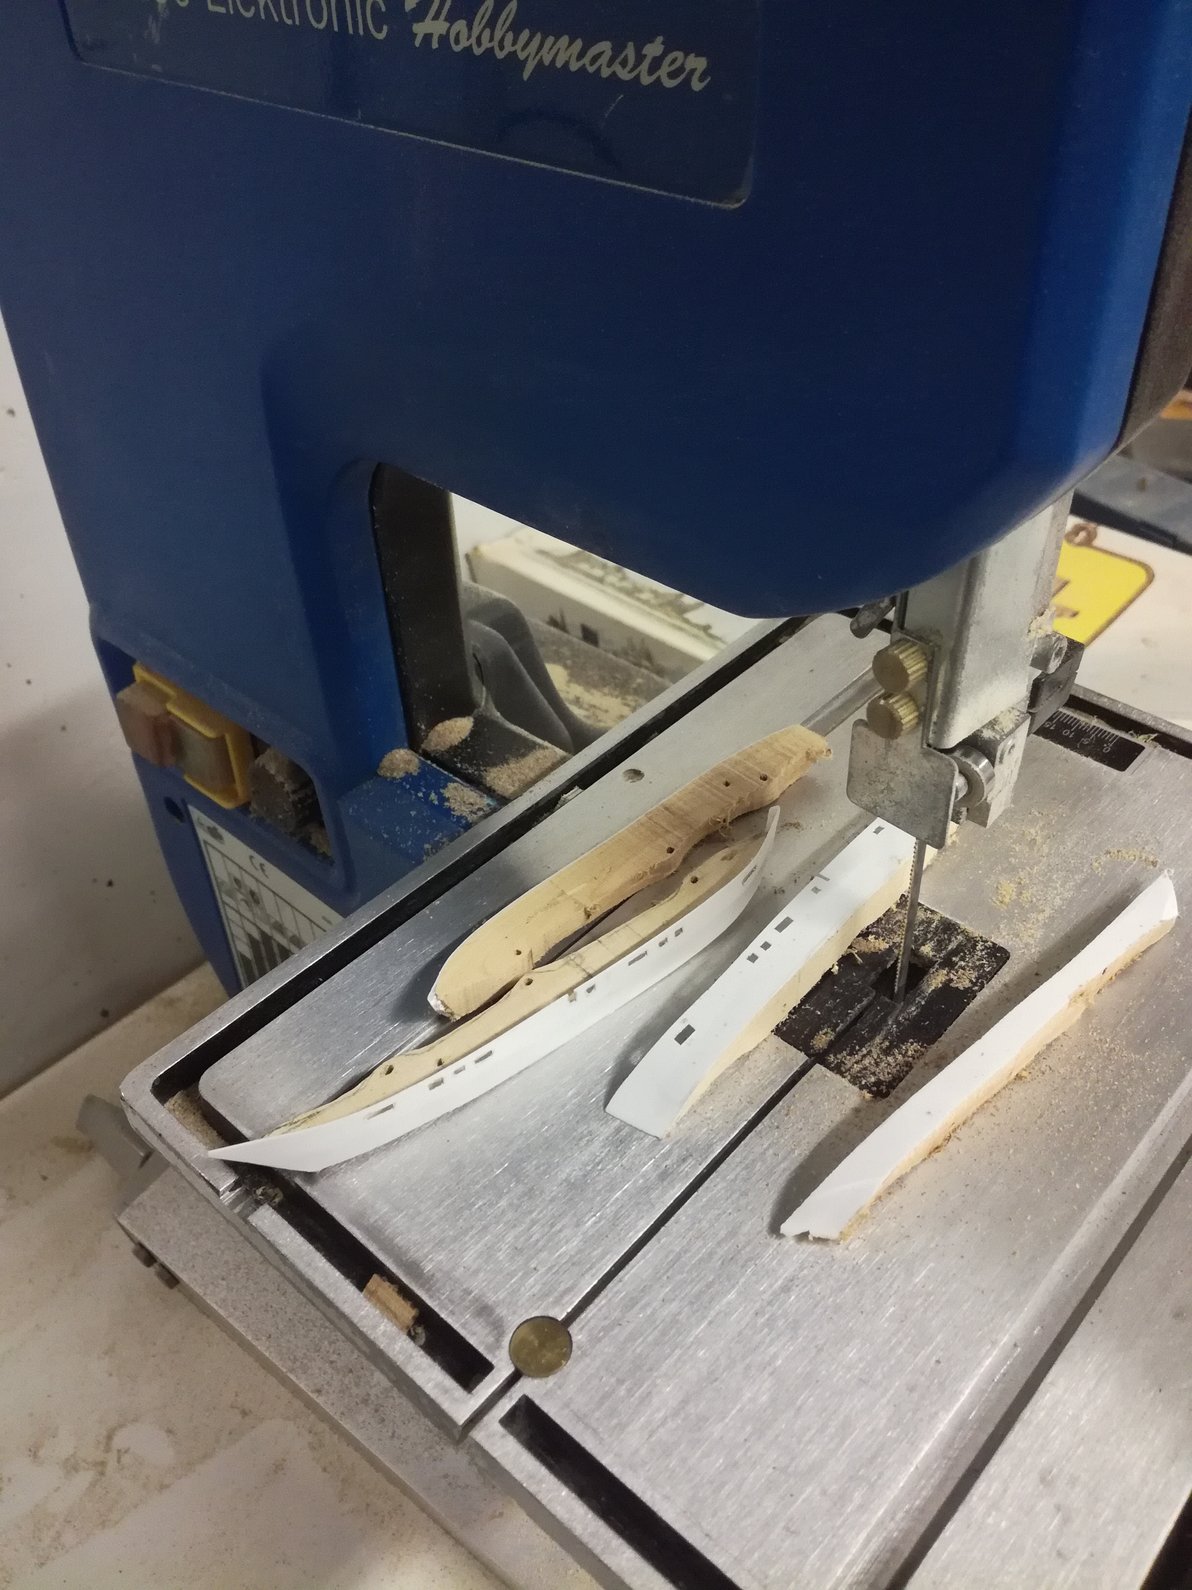
Some progress made but also some mistakes! I am using 0,5mm thick white plastic to skin the hull of 'Alabama' but it's a bit difficult to mould around the hull;0,3mm would of been easier but I am afraid that the bulwarks would be too thin and weak. Had a few cannons left over from the 'Black Pearl' so I can use them to check inside height of the bulwarks. On Tuesday evening had the opportunity to use a hobbymaster bandsaw to slice up the hull. As you can see that didn't go so well;cut a bit too much off the bottom but it is still usable. The wood is terrible,can't remember where I got it from but I won't be using it again! Even sanding it is difficult,always leaves a ragged edge,anyway it all pegs back together quite nicely.Last picture is the bottom piece cut off, just to show the grain of the wood.