

James w rogers
-
Posts
287 -
Joined
-
Last visited
-
Days Won
89
Content Type
Profiles
Forums
Gallery
Events
Posts posted by James w rogers
-
-
-
-
First coat of paint for sea.


-
 This is the sea after a bit of shaping, I will paint it when it is dry enough in a day or 2.
- DSiemens, Bernard Kelly, Onni and 2 others
-
 5
5
-
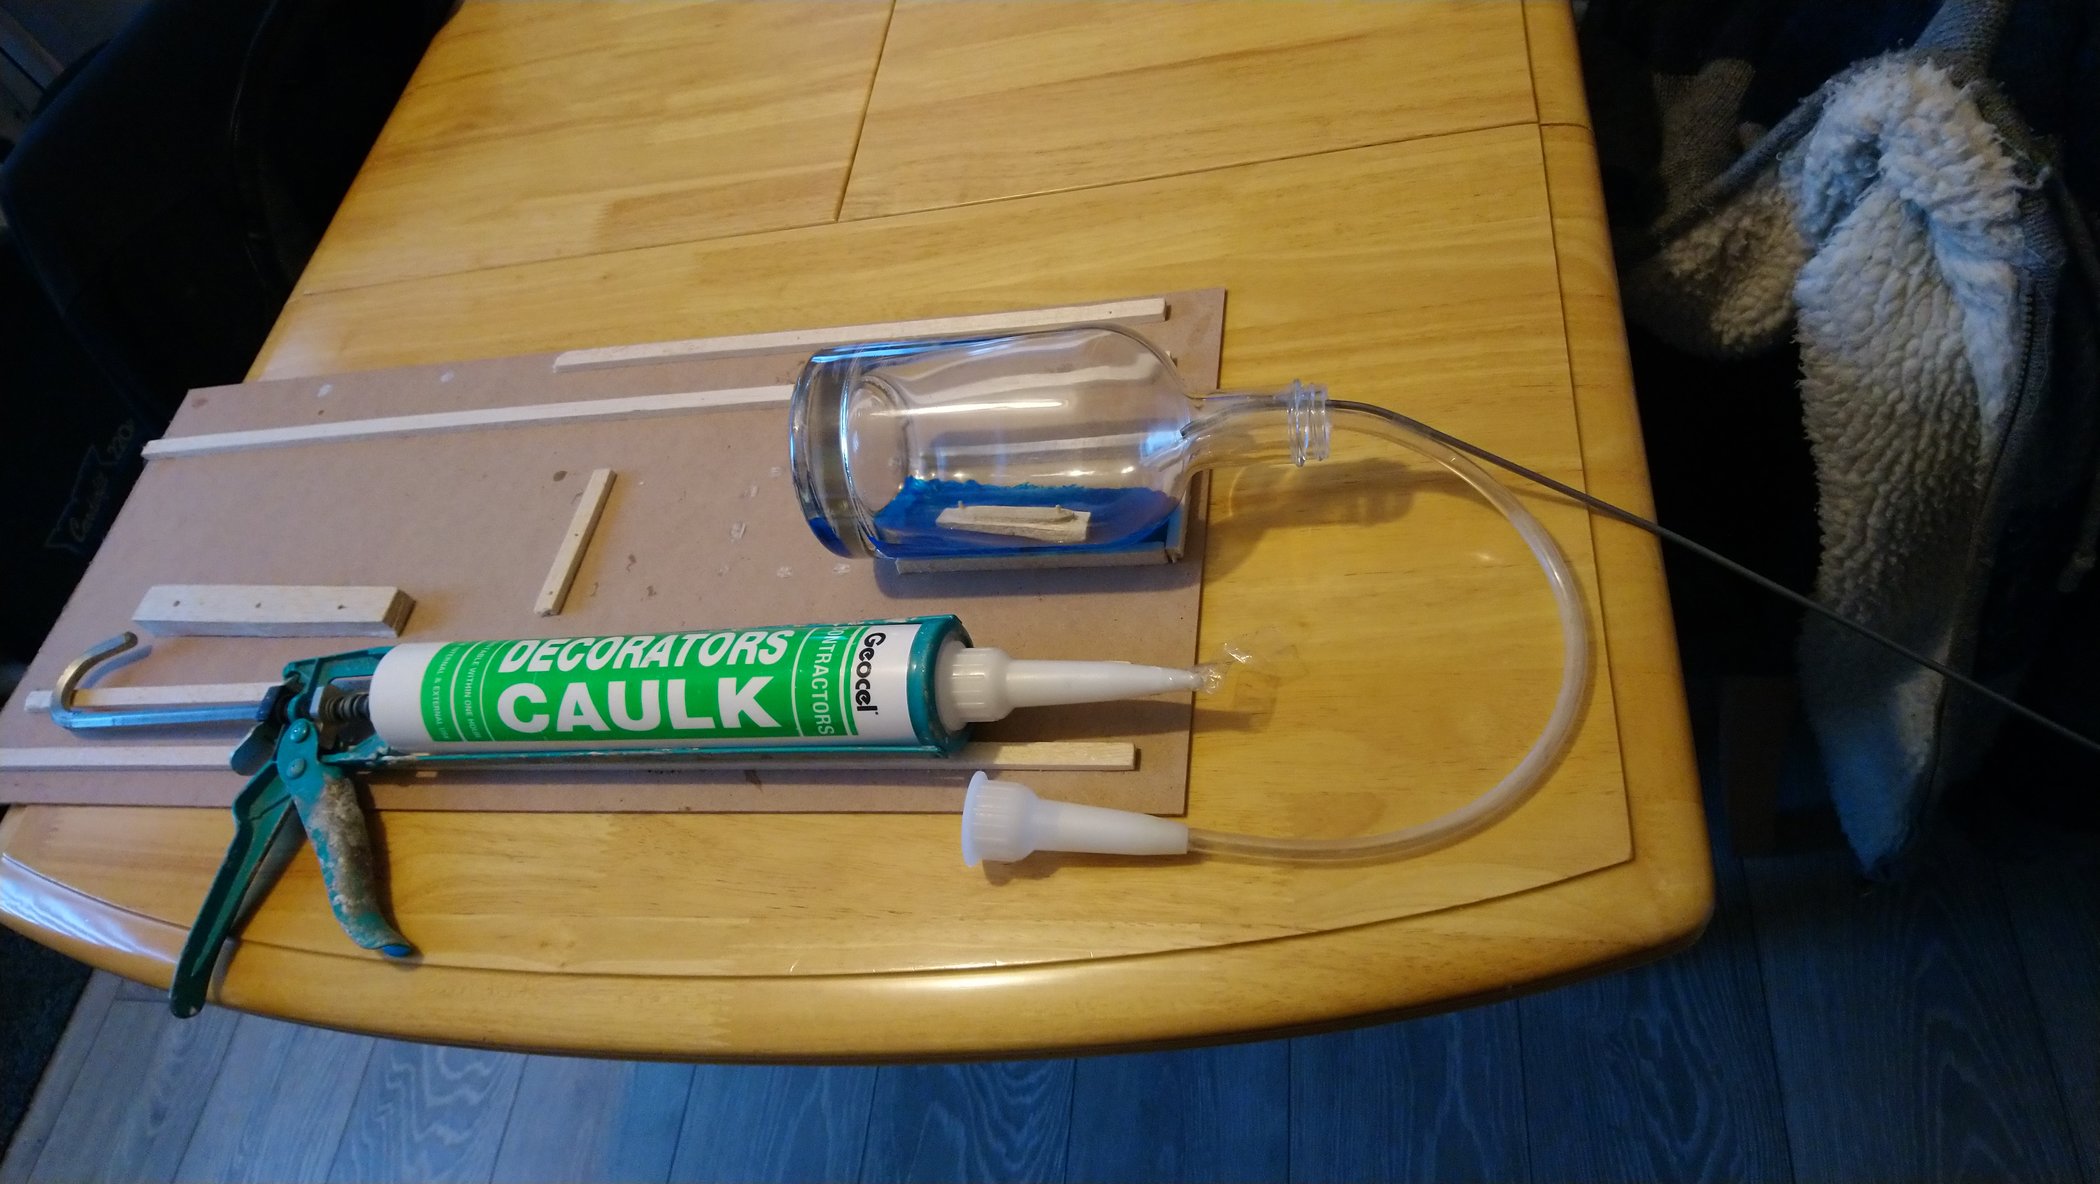
Well, she's ready for the bottle. Now I need to put the acrylic in the bottle, this is my way of doing it.


- JesseLee, Bernard Kelly, Onni and 2 others
-
5
-
-
Looking great Bruce, that sea looks amazing!
-
21 hours ago, Bruce Foxworthy said:
James:
Well I think I'm going to give your sail making technique another try on my next build. I just think that the synthetic stuff I had on hand when I tried it was so thin that it couldn't help but get kinks in it when I folded it up.
Can you tell me what the material is that you are using? Is it a cotton or what?
Thanks Bruce
Hi Bruce, I think it's cotton, not 100% sure though, it was a very old pillow case. 😁

-
-
Ship is ready, so started the sea in the bottle. First coat of acrylic paint is now in, and when dry will be covered in acrylic caulking for the sea. The black line is just marker pen on outside of glass used as a guide. Silica gel packets really speed up the drying process by soaking up the moisture in the bottle. 😁

The bottle as a really thick base so I will hide this with a rim of wood that will be part of the base.
-
-
Welcome aboard!😀
-
3 hours ago, Onni said:
Your build is looking great James. Sorry to hear about your leaking roof, hope everything is ok now.
Thanks onni, all sorted and nearly back to normal, just lots of decorating to do! hope you had a great Christmas. 😁
-
So a major roof leak put build on hold, and Christmas came and went! Luckily nobody told the person I was making it for so nobody was disappointed on Christmas morning 😂, apart from me as its still on my bench! So today I am resuming the build.

Hi Bruce foxworthy, This is how my sail cloth looks after it has dried, so I cut a sail out of it to suit depending on how much curve I want. 😁 I don't dry it flat, but let it curl up naturally, That way it retains its shape better.
- exwafoo, JesseLee, Bruce Foxworthy and 3 others
-
6
-
-
-
-
Slow going but getting there! How long have I got til Christmas? 😲😲
Making sails from some old creamish coloured pillow case painted with a watered down pva mix, but only on one side, then placed wet side up on radiator to curl it, voila 20mins later its dry and ready to use!


- Onni, Chasseur, Bernard Kelly and 3 others
-
6
-
Started rigging the shrouds on the masts, these strips will be cut to short lengths and glued inside bulwarks when inside the bottle. Trying to get a suitable green paint to match the picture is proving troublesome, mixed some yellow in 3 times now to lighten it but every time it dries to dark, so I’ve given up, that’s the colour now, take it or leave it!😂


-
That’s a beautifully made model you have there, Very impressive! Can’t wait to see the small one! I could see the advantage of a 10 litre bottle, at least you’d probably be able to get both arms in the neck!😂😂
-
Great words! Really enjoyed reading that, thanks.😎
- Chasseur and Bruce Foxworthy
-
2
-
Welcome aboard!😀
- Chasseur and Bernard Kelly
-
2
-
As usual, I’m sure it will be well worth the wait! Something to look forward to! You do a great job!
- Chasseur, Bernard Kelly, IgorSky and 2 others
-
5
-
Getting there ! Slow progress as spent more time trying to trace this ship. It is definitely documented as a merchant ship but can’t find any surviving plans or pictures, so apart from this stamp the rest of the decks fittings are a total guess. Here’s the story so far, needs a bit more shaping and sanding prior to paint, so have started on the masts and yards.


This is is how I bend planks and other wood items, I soak the wood and then strap to the bottle with an elastic band, then fill bottle with boiling water and just leave over night, usually works quite well as long as the grain of the wood allows. If you need a bigger or smaller bend you can just use different diameter bottles!


La madonna del rosario 1740 (tartana).
in Build Logs
Posted
Main mast is in. The problem with lateen rigged sails is in the absence of wind there's nothing to hold them up! So I have to set the yards and lines with glue. 😁