Dave Fellingham
-
Posts
219 -
Joined
-
Last visited
-
Days Won
49
Content Type
Profiles
Forums
Gallery
Events
Everything posted by Dave Fellingham
-
That's excellent, Alan. Match it with a V block and make quick work of drilling holes in spars. The V block will also come in handy to give support to a thin spar while sanding it. Dave

-
Keep that first one the way it is. I wish I had kept my first, even with all of its flaws, just to see how far I've come. You're about where I guesstimated, experience-wise, and I put out that tip for future use by you and others who are still working on basics. Tapering the spars is one of the easiest ways to improve the scale look without a lot of extra effort. I certainly wasn't suggesting that you re-do the work you've done - that's entirely up to you - the information was for future reference. You've already shown you're not intimidated by tiny fiddly bits, like in the cannons, so I figured you were ready to make use of this tip. What wood are you using for spars? Toothpicks or other similar found wood? Many builders like bamboo skewers from the grocer but I find it difficult to drill holes precisely where I start them because of bamboo's structure. I've been using basswood, available from most hobby shops, for most of my spars and bamboo for some masts when I don't have to drill holes in them except at the hinge. I'm looking for something better, perhaps pear, holly or boxwood. Dave
-
Do I see a Syren in the background? Very good work so far on her. The hull of the pirate ship is well done with good work on the details. You've done well keeping all that work to scale. The mast hinges turned out nicely, but I'm sure you'll agree that the masts and spars are out of scale in diameter. One way to fool the eye into seeing them thinner is to taper them to a tip that is half the diameter of the thickest part. At left is a one piece mast very similar to those on your model. To its right is a similar mast with the same base diameter but it tapers to a tip that is half the base diameter. The yard at upper right is again similar to those on the model. Below it is a yard the same diameter in the center but it tapers to a tip that is half the diameter of the center. Notice that the tapered spars look much thinner even though the greater diameter remains the same. With practice you can get the spars much thinner and more to scale. The limitation is the diameter of the holes drilled in them. In mid spar I rarely drill a hole larger than 1/3 the spar diameter and at the tips 1/2 the diameter. I usually rough out the spar, drill the holes then finish sand to size making sure the holes stay on center.

-

Question about putty as sea material
Dave Fellingham replied to Gwyl Blaser's topic in General Ships In Bottles Discussion
I use the rounded and polished end of a 3/16" / 5 mm steel rode to tap little wavelets into the entire surface until they are all overlapping each other after sculpting the general form of the waves. Don't try to make waves like you see at the beach, those only happen at the beach in shallow water. Look at lots of photos of deep water ocean (not surf - ships and ship captains don't want to be anywhere near surf) and don't try to make your practice oceans too dramatic. -
You can rig all the shrouds and backstays outside the bottle but you won't be able to set the masts into a hole or tube. You can use either hinges at the bottom of the masts or use one of two variations on what I call the "divot" method. For this just drill a very shallow hole - just up to the shoulder of the point of the bit the same diameter as the mast - leaving a shallow "divot" to locate the base of the mast. The base of the mast has a matching shallow cone to fit in the divot. Glue a length of thread into a small hole drilled in the center of the mast base and pass this thread through a small hole drilled through the hull at the center of the divot to draw the base of the mast into the divot. The thread can be omitted if you don't mind guiding the mast into place from outside the bottle. I've used both variations but prefer the thread when there are deck obstructions. It is possible to rig an entire vessel outside the bottle, pull the masts out of the divots which collapses the rigging like a pup tent. Inside the bottle, all that is required is to move the bases of the masts back into the divots. However, this method requires clear space forward of the mast locating divots to allow the mast bases to slide on the deck into position. Having some stays loose will allow moving the mast bases into the divots around or over obstacles. Conventionally, all of the fore-and-aft stays (six on the foremast, four on the other four) will have to be routed out the bottle - 14 to 22 total, depending on how they're rigged. Here's three sketches of what happens to the fore-and-aft stays. A brig with three yards on each mast, other spars (spanker boom and gaff) and all rigging but the fore-and-aft stays have been omitted. There are two variations on rigging these stays. First is to have the main topmast stay (middle one on the aft mast) route through the foremast (and becomes the forestay) and through the deck. Similarly with the main topgallant stay (the upper one) through the foremast (and becomes the fore topmast stay) and through the bowsprit. You won't be able to glue the fore topmast stay sail to the stay, it will have to slide on that stay. The alternative is to rig the main topmast and topgallant stays more realistically by passing the stays through eyes glued to the aft side of the foremast and down through holes in the deck and out the bottle. They can be routed through the same hole as the mainstay. Of course, all the forestays start on the foremast and go out through the hull and bowsprit in this variation. Here we have the two variations on masts. The upper has the bases of the masts fixed in place by hinges. The stays are all the same length as those on the first sketch. Notice how much more line will be needed in order for the masts to fold down. If the stay continues through the foremast then the shortages are added together and it also shows why many staysails can't be glued to the stays when continuous stays are used. The lower sketch has the mast bases loose. It seems possible to attach the stays at both ends to the mast and deck as shown but I would plan for the stays going through the bowsprit being control lines. On a five-master, the main mast stays going through the deck may need to be loose as well. This could cut the number of stays out your bottle down to six or eight, maybe ten. I've never tried the divot method (with none of the stays being control lines - just like erecting a tent using nothing but the tent poles) on more than two masts. I've learned that Murphy takes special interest in ship bottling and I prefer having options when - not if - something doesn't go as planned. If you're intending to rig the shrouds and backstays loose and draw them with the pull of one string, it would depend on 150 tied and glued knots not failing. You would need to glue off all of those threads individually inside the bottle to make sure the standing rigging doesn't go slack if any of those knots fail with time. Depending on how complete you intend to rig Preussen, I see eight or ten control lines in the fore-and-aft stays and two control lines for the spanker boom. Braces, yard halliards, topping lifts, clew lines, bunt lines, leech lines, reef tackles, etc. can be rigged outside the bottle and won't need adjustment inside the bottle, with a few exceptions such as tacks (and those are easy in the bottle but rarely done). I don't see any point in doing up-hauls, down-hauls and both the sheets on all the stay sails (and much of the listed running rigging) on a model of Preussen that isn't much longer than Bob's pen. You're going to have a problem keeping the diameter of the rigging to scale; simplifying the rigging somewhat will help balance over-size lines. Even the finest fly tie thread is grossly out of scale for stay sail lines and many other small lines.


-
Although this isn't a step-by-step construction as is usually done for a build log, I think it should be with them rather than in "The Bilge". As someone else said, a ship in a bottle should first be a good miniature, putting it in a bottle is merely a display choice. The miniature ship models by you and others are inspirational to many of us ship bottlers. I'm curious about your painting, Bob, it's perfect. Do you use an airbrush? What paint?
-
Preussen has been bottled many times including by the Philippine company that makes most of the cheap, tourist-shop SiBs (#4 below).


-
Question about putty as sea material
Dave Fellingham replied to Gwyl Blaser's topic in General Ships In Bottles Discussion
I have used polymer based modeling clays successfully for many years. There are several brands - Sculpey and Fimo come to mind - available from most art supply stores. They can be baked at a very low temperature but I've never done it, I just leave the sea as sculpted and set the model in it. They don't bleed objectionable solvents or take months to dry like some alternative materials. About a year ago I saw a photo of my second SiB and the sea looked the same as it did 38 years ago. -
Books and Research (Moved) From Build log
Dave Fellingham replied to Dave Fellingham's topic in Odds And Ends
I posted some pdf files of several books from the late 18th and early to mid 19th centuries on my USS Constitution build log covering masting, rigging, block and sail making and other technical aspects of outfitting sailing ships. The methods haven't changed much since then and are still very useful. The books by Steel were first published in 1794 and were used by Royal Navy officers as text books. They are still in print which testifies to their usefulness. Be prepared for letter 's' that looks similar to an 'f'. David-Steel-Vol-Ia-Elements-and-Practice-of-Rigging-and-Seamanship-1794.pdf David-Steel-Vol-Ib-Elements-and-Practice-of-Rigging-and-Seamanship-1794.pdf David-Steel-Vol-IIa-Elements-and-Practice-of-Rigging-and-Seamanship-1794.pdf David-Steel-Vol-IIb-Elements-and-Practice-of-Rigging-and-Seamanship-1794.pdf This is a manual for rigging by Steel excerpted from the larger work and published separately at a later date. The_Art_of_Rigging_by David Steel1.pdf This book by Lever, which I have mentioned before, was first published in 1809, similar to Steel's "Art of Rigging". It is also still in print and covers more of what was done on merchant vessels. It has more illustrations and is my primary "go to" for rigging details. It was purchased in bulk by the early US Navy for officer training from about 1820 until the publication of Brady's book. Darcy_Lever_The_Young_Sea_Officer_s_Sheet_Anchor1.pdf This last by Brady, an American, was first published in 1841 and covers American practice, for both US Navy and mercantile vessels. It's no longer in print. This is an 1849 edition. The Kedge Anchor1, William Brady, 1849.pdf -
Biggest difference between bottling in a horizontal bottle and a vertical one is that the vessel is usually inserted stern first in a horizontal bottle while it is usually better to insert into the vertical bottle bow first. Also in a horizontal bottle many of the control lines are through the bowsprit while in a vertical bottle those lines come through the masts. This would apply to most of the center line stays. Vertical bottles are somewhat more difficult than horizontal but not too much. Vertical bottles with the neck down are challenging and require a very different approach and bottles without a thickened bottom (light bulbs, clear Christmas ornaments and some laboratory bottles come to mind). The larger the neck ID the better, as you realized. I try to keep the ratio of the neck ID to the bottle ID around 1:6 or larger to avoid problems getting the vessel through the neck. At 1:4 (1 inch/25 mm neck and 4 inch/100 mm bottle ID) most full hull models will fit without using a two part hull. At 1:8 a two part hull is frequently required. Two part (or more) hulls are difficult and I avoid them like the plague. Use the best quality bottles you can find. Most single use consumer product bottles distort the view of the models because the glass isn't uniform in thickness with waviness and surface defects. I've seen several very nice models (as far as I could tell) that couldn't be seen well because of wavy, murky, pebbly glass.
-
Build a named ship or just generic?
Dave Fellingham replied to Landlubber Mike's topic in General Ships In Bottles Discussion
Suggest for the first few that you just do a simple type that appeals to you. Two-masted Banks fishing schooners or early racing yachts that evolved from them are lovely in their simplicity and will allow you to become familiar with the basic SiB techniques without putting in a lot of time on fine details. Most of the SiB books I've seen will take you through a few projects, each more complex than the last, that will build your SiB skill set. I built SiBs for many years all as types to cut the amount of time spent planning and researching a project. Later I became more interested in more accuracy and finer details. For the "type" projects I printed out a photo of the vessel I wanted to build at the size I was planning. If the visible details can't be identified, I left them off, or if they were too small to make. It's better to leave off details than try to include them made grossly out of scale. -
How cool! A 1:1 scale working model!
-
Summer building vs Winter building
Dave Fellingham replied to Gwyl Blaser's topic in General Ships In Bottles Discussion
When I started bottling ships I moved a lot working large construction jobs and kept all my tools and supplies in a fishing tackle box which I still have 35+ years later. I outgrew it about 10 years ago simply because I got away from that kind of journeyman work but could still use it if I had to. Tackle box closed with dial calipers for size reference. Box with cover open and storage folded. Box completely opened. There's an airline size, single serving glass liquor bottle in the bottom. There's also a larger single serving glass wine bottle with a partially built America I had forgotten. Thanks for making me look in this box again; I thought America was lost years ago. As proof that this box is as old as I say it is there are bottles of paint in the bottom that now make pretty good rattles because the volatile ingredients have long ago evaporated.


-
History shows us that saying something is "unsinkable" is nothing but hubris and is just asking for special attention. Mention of Ocean Ranger reminded me of how I "dodged a bullet." In the fall of '82 the company I worked for installed equipment (tanks and piping) on Glomar Java Sea while it was engaged in exploratory drilling off the California coast. It was either an Arco or Glomar rep who approached me about signing on for work on GJS in the South China Sea (the equipment I installed was in preparation for this next assignment). I declined. In October '83 Glomar Java Sea sank with the loss of all 81 hands during a typhoon in the South China Sea.
-
Interesting coincidence, Jeff, I may have met the same guy. I was on stand-by as a welder during the placement of the submerged portion of an oil platform for Exxon (formerly Esso) and the subsequent erection and welding of the superstructure to it. I was quartered on the crane barge - the heaviest lift crane barge in the world at the time - during these operations. The barge was fitted with a second crane (15 ton capacity) specifically to handle the slings and shackles for use on the big crane. One of the men on board was in charge of all the rigging and he was pointed out to me as the only man certified in North America to make spliced eyes and service cable slings and such in the field at the sizes needed on this crane barge. This was in '86 or '87, if memory serves. Dave
-
Thanks, Gwyl, it was my pleasure to post those pdf files of those old books. I figure the best way to model the various parts of 18th, 19th and early 20th century sailing vessels is to have an understanding, or a least a passing familiarity, with actual practice. These manuals were used by Royal Navy, East India Company and US Navy officers and skilled tradesmen at sea (like sail makers and carpenters) from the late 18th century through the end of the use of sail power on naval vessels. Nearly every English speaking officer and tradesman on sail powered commercial vessels made use of one or the other of these books well into the 20th century. They were an indispensable part of their trade and were likely the only books those men owned other than a Bible. Lever and Steel are still in print more than 200 years after their initial publication which is all the testament to their usefulness I need. I found the Lever pdf. I prefer Lever simply because it has the best illustrations and only refer to Steel for items not covered by Lever. I have it as hard copy - and consider it my most important and useful reference book - so didn't think to download it as a pdf until a few minutes ago. Darcy_Lever_The_Young_Sea_Officer_s_Sheet_Anchor1.pdf There are other books by numerous authors that are derived from these works but I don't have much use for them since I have the originals. Dave
-
The files for David Steel's "Elements and Practice of Rigging and Seamanship" (1794) could not be reduced further and required dividing each volume into two parts. Volume Ia includes the Table of Contents with chapters on Mast Making, Rope Making, Anchor Making and part of Sail Making. Volume Ib concludes Sail Making and includes Block Making and Rigging. Volume IIa includes Seamanship and part of Naval Tactics. Volume IIb concludes Naval Tactics and includes a Miscellaneous chapter and an Appendix of rigging tables. David-Steel-Vol-Ia-Elements-and-Practice-of-Rigging-and-Seamanship-1794.pdf David-Steel-Vol-Ib-Elements-and-Practice-of-Rigging-and-Seamanship-1794.pdf David-Steel-Vol-IIa-Elements-and-Practice-of-Rigging-and-Seamanship-1794.pdf David-Steel-Vol-IIb-Elements-and-Practice-of-Rigging-and-Seamanship-1794.pdf Dave
-
You give me too much credit, Gwyl, I'm just standing on the shoulders of giants like Tyrone Martin, Olof Eriksen and many, many others. In many cases I picked up a hint or clue from someone else's research being discussed on other ship modeling forums similar to this one and followed up on it or dug a bit further. Mostly my research follows directly in other's footsteps. Google has been a very big help. Gwyl reminded me that Adobe Acrobat has a file reduction function. I tried it on Steel's "The Art of Rigging" and Brady's "Kedge Anchor" - reducing the files by 35-40%. Here they are: The_Art_of_Rigging_by David Steel1.pdf The Kedge Anchor1, William Brady, 1849.pdf Be aware that Steel's works were published at a time when an 's' looked much like an 'f' without the little cross bar. Similarly with capitols. In words with double esses (e.g. possess) it will look much like pofsefs, but without the little cross bars). Confusing at first but the eye and brain quickly adapt until you hardly notice those peculiar 'efsef'. Spellings may seem a bit bizarre at times as well. Do you remember your English teachers red-lining your homework and commenting on run-on sentences? Steel is a grand master of run-on sentences, but it was the style of the time. I'm going to try the file reduction on the two volumes of Steel's "Elements..." but I may be forced to turn it into three files. Dave
-
I made a mistake in the link to Scribd. Here's the corrected link: https://www.scribd.com/
-
Quick update. Received the three books I purchased on the web. I received Tyrone G Martin's "A Most Fortunate Ship, A Narrative History of Old Ironsides" revised edition (1997) first and read it straight through that day and the next. A wonderful read covering Constitution's history from design through Commander Martin's tenure in command from 1974 to 1978. He was the first officer to be decorated for his service while in command of Constitution since Hull, Bainbridge and Stewart received Congressional Gold Medals (the forerunner of the Congressional Medal of Honor - Preble received a Congressional Gold Medal in the First Barbary War) during the War of 1812. Constitution received its first unit citation while under Martin's command. He instituted the wearing of War of 1812 uniforms by officers and crew, the daily firing of dawn and sunset salutes and the annual turnaround cruise on the 4th of July and firing of the nation's birthday salute at noon. Most important were his successful efforts to change the policy, at the time, of repairs as needed to one of regularly scheduled preventive maintenance and the step by step restoration of Constitution's configuration to that of her glory years. Commander Martin is considered one of the foremost authorities on Constitution. The book itself was used, at an excellent price, with only some slight edge tears of the dust jacket. I'm currently reading it again in detail. It also gives an excellent insight into life at sea during the early years of the sailing US Navy. Very highly recommended even for someone not interested in modelling the Constitution. I'm considering getting the first edition just to see what was changed in this edition. "The Boats of Men-of-War" by W E May (1999) arrived next. It is a slightly revised edition of the 1974 edition with corrections by Simon Stephens as a result of new information found in the 25 year interval. The National Maritime Museum (in Greenwich, England) holds the copyright. I bought it for more specific information on the boat types used on Constitution and as a reference book for my library because it is considered by many to be the definitive work on the subject. It is full of photos of models, boat plans and tables of component dimensions and covers wooden boats used on warships from the 17th century through the first half of the 20th century. Very comprehensive but definitely not needed by the average ship modeler. This copy was also purchased used at a bargain price but arrived in almost new condition. Constitution is known to have carried two launches, four cutters and a gig in the battle with Guerriere. This photo (ca. 1880) from May's book clearly shows the differences between these three types. The boat in the foreground is a gig, the one behind it is a cutter and the one behind that is a launch. The third book was "Constitution, All Sails Up and Flying" by Olof A. Eriksen (2009). This 400 page paperback book (8 1/2" x 11" / 22 cm x 28 cm format) is without a doubt the most comprehensive work on the rigging of a specific ship I've ever seen. Mr. Eriksen received from Tyrone Martin a complete typewritten copy of the detailed notes by Midshipman Edward Clifford Anderson on board Constitution during her re-masting, re-sparring and re-rigging in 1834-35. Eriksen used these notes, comparing them to standard masting and rigging manuals of the period by Steel (the name that had slipped my mind when I made my previous post), Lever and one published by Brady in 1841, and to the Hull model. The book covers these comparisons, spar by spar, line by line and sail by sail from stepping the bowsprit to rigging the mizzen skysail. Every sail is completely detailed, even the stowing of the boats and the rigging of the guns are fully detailed. There are deck plans that show were every line of running and standing rigging was tied off. When Eriksen rigged his model of Constitution he went so far towards historical accuracy as to follow the notes and the manuals to erect the masts exactly as described. He photographed the process and included the photos in the book. He does not cover anything about building the hull for his waterline model, just the masting and rigging. Olof Eriksen and his model of USS Constitution as it appeared one hour before engaging Cyane and Levant on 20 February 1815 According to Eriksen he had 4000 hours invested in his model of Constitution up to the beginning of the work described in the book and 20,000 hours upon completion. It took 18 years to build and is made of steel in recognition of her nick name. The model is at a scale of 1/2" = 1 foot (1/24 scale). Completed, it is over 13 feet / 4 meters long, 10 feet / 3 meters tall and 8 feet / 2.5 meters wide with studding sails set. It weighs 1,350 pounds / 610 kg. It is currently in a museum that doesn't even mention it on its website. Like almost anything given away, it is clearly not appreciated. The labor alone is likely worth near $1,000,000. The model has four miniature TV cameras concealed inside the hull to give views of the gun deck. There is a brass plaque in the Captain's cabin, visible to one of the cameras, dedicating the model to Commander Tyrone Martin, USN retired. I bought this book new because every copy available used was at the same price as new or higher! The only library I could find that has a copy is the Library of Congress. At US$83.00 it will be worth every penny and save me a lot of research time. The sparring and rigging manual by William Brady is available as a free e-book. Search: "The Kedge Anchor" by William Brady The rigging section of the two volume manual by David Steel is also available as a free e-book. Search: "The Art of Rigging" by David Steel. Both volumes of David Steel's "Elements and Practice of Rigging and Seamanship" (1794) are available in pdf format with membership at Scribd (www.scribd.com). They are also available to read at Steel (This link goes to the Historic Naval Ships Association website.) Darcy Lever's "The Young Sea Officer's Sheet Anchor" is available in a large format (8 1/2" x 11") paperback for US$14.95 from the usual sources. You may find used copies for much less. I was going to post here pdf copies of the Brady and Steel manuals but they are all over the 20MB limit (the largest files are just under 40MB). If anyone wants a pdf of any or all of these just PM me with your e-mail and I'll send them to you. Dave


-
I looked again at “Constitution: All Sails Up and Flying” by Olof Eriksen, found it on Google, where I could read some of it, and decided I had to have it, ASAP, whether it fits in my budget this month or not. The portion I was able to read on-line included (among others) his research and conclusions on the Bentick shrouds on the fore and main masts and how they were rigged. He concluded that the Hull model correctly depicts them attached to the channel by a pair of blocks. This accounts for one of what I concluded were "shroud preventers" on each channel. The current USSC has them terminated at the waterway inside the bulwark rather than on the channel outside the bulwark. From what I could read, Eriksen compares, line by line, much of the standing rigging on the current USSC with period books by Lever (which I rely on heavily), Brady and another gentleman (whose name escapes me at the moment - getting old sucks) and the Hull model. I suspect that I will be relying on the Hull model and Eriksen's book for much of the rigging. Dave

-
You would. The biggest drawback to the 50 L flask is cost, but experience has shown me that quality has a cost and that quality glass is worth every penny at twice the price. My photo-shopped concept image reminded me of the three earliest known SiBs by Giovanni Biondo. Model of Fama built by Giovanni Biondo in 1792. This bottle is clearly not spherical but is close in size to the 50 L flask. My mention of the Royal Navy draft of President, dated 1815, reminded me to take another look at it. The Royal Navy draft of the captured President. I made a detailed comparison between the three drafts I have and USSC as it is currently. First thing I noticed is that the Gun Deck gun ports on President are located somewhat differently (they look to be generally shifted aft) than on the Doughty and Chapelle drafts and that those gun ports on the current USSC are changed very little, if at all, from the Doughty and Chapelle drafts. The biggest difference is the bridle port added at the fore end of the Gun Deck by Bainbridge after he took command. The President draft has the bridle port. The Chapelle draft includes a pronounced flare of the bow bulwarks, which dates much later, and the Gun Deck bridle port. The draft of President clarified for me the more likely appearance at the bow rail. This draft also includes a partial detail of the transom with six gallery windows. I also compared these drafts to the Hull model and found what must be called an error on the model's Gun Deck. The Hull model has 15 ports on the Gun Deck but the most foreward of them is very close to the location of the bridle port cut out later. The spacing is consistent with the Doughty and Chapelle drafts but is one short. The only conclusion is that the model is short by one gun port and an average space between ports amidships. This realization resolved several inconsistencies and allowed further progress on my working draft, particularly the Spar Deck gun port locations and deadeye assemblies' positions on the channels. The channels on the Hull model are shorter than those on the Doughty draft and much shorter than those on the current USSC. I'm inclined to give the Hull model greater weight in this regard because the unnamed men who built it likely knew better than anyone about such details. The channels show two or three extra shrouds rigged with conventional blocks on each channel. Log entries for USSC between the declaration of war and the battle with Guerriere include the mention of rigging "shroud preventers". A preventer is an extra line rigged specifically as backup in case of battle damage and these block rigged shrouds seem to be the preventers mentioned in the log. Details that only crewmen would know. I have also resolved the issue of the guns carried by USSC just before the Guerriere duel. Armament was 30 - 24 pounder cannons on the Gun Deck with 24 - 32 pound carronades and a single 18 pounder cannon on the Spar Deck. Unfortunately, I have no idea where this "shifting gun" might have been stowed. Some sources say this 18 pounder was rebored for 24 pound shot and is sometimes referred to as a gunade. Log book entries during the Great Chase state the 18 pounder was run out one of the stern chase ports, a 24 pounder was brought up from the Gun Deck and run out the other stern chase port which necessitated cutting the taffrail, and two more 24's were run out gallery windows. Bainbridge eliminated the 18 pounder by the time he fought Java, By 1815, four of the carronades were removed and replaced by two 24 pound gunades when USSC faced Cyan and Levant. Dave


-
Thanks, Gwyl. Research was a major chore in the pre-internet days when I started modeling ships,and I hated doing it. Now, with the web, I greatly enjoy it because I can put together in a day what took over a year 40 years ago. I enjoy the detective work needed to find the little details that ensure everything on a project is correct, or at least a best informed guess. Just a few minutes ago I was reading some information about USSC and found the anchor hawser size - 22" circumference. I have a Word document open all the time i'm prowling the web so I can take notes and sources for little bits of information like that. I found I can build better models when I've done my research. Another textual source for USSC from the Library of Congress collections I'm finding very useful is The Captain's Clerk I'm considering Corning Pyrex boiling flasks of either 22 or 50 liters - 12" / 30 cm or 18" / 46 cm in diameter, respectively. I like larger scales because I can include more and better details and I like the spherical containers because they allow viewing of the model from all directions, even straight down. They are also easier to work in than a bottle since the model can be best positioned in relation to the opening to work on it. I'm leaning towards the larger boiling flask with the model at 20 ft to the inch, 1:240 scale - about 15" sparred length which is gigantic for an SiB and about the same size as the plastic Revell Constitution I built 50 years ago. Alex, thanks for the offer of photos during your visits to the museums, but I can't think of anything specific at this time. I suspect you checked the link to the Hull model photos and found them as informative as I did. What I'd really like to know is what NHHC has planned for the stern restoration and why. I've bookmarked the photo page for the restoration work and am getting into the habit of checking on the progress.
-
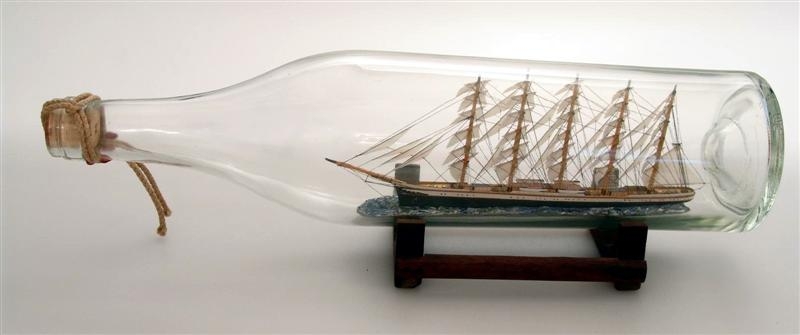
After much discussion, both public and private on this forum, I've decided to build a model of "Old Ironsides" in a bottle. After a quick study of the available information, I decided to depict her as she appeared just prior to her battle with Guerriere which inspired her nickname. The Constitution is currently in dry-dock for a two year refit including replacement of the copper sheathing and a probable restoration of the stern decorations to the 1812 configuration. My dead line for completion will be around the time of completion of this refit. I photo-shopped a general idea for my model in a bottle using an image of a completed Revell model with the bottle shape drawn in. I've decided to use a spherical boiling flask, neck down, with Constitution displayed as a conventional full hull model. I have not decided on the size of the boiling flask or the scale of the model. General plan for USS Constitution in a boiling flask, neck down. Research I ordered and received the set of drawings on CD from the USS Constitution Museum [ USSC Plans ] and set to work. The three view plans of the hull from the CD are from a draft by William Doughty under Joshua Humphreys' supervision following the original Humphreys plans and suggested revisions by Josiah Fox. On the CD this plan was in two parts and needed to be reassembled. This required cutting up, digitally, these two pages into five pieces - fore and aft profile, fore and aft plan, and the end view - and reassembling them with as much distortion (from reproduction of the original images) as possible removed. I'll call this draft the Doughty plan and it is my primary source for the hull form. Doughty plan after reassembly with some additional text for scale of this draft, notes and view labels. I also downloaded Howard I. Chapelle's re-draft of the same 1794 plans because he includes profiles from station lines forward and aft of the last frames built square to the keel which I can use to check my own projections in these areas. [Chapelle plans] Having two re-drafts of the same plans proved useful later. "The History of The American Sailing Navy: The ships and Their Development" by Chapelle has been useful for understanding the history of the draft being used. Chapelle plan used to double check some details when needed. Both 1794 plans show 15 guns on the spar deck with a low bulwark at gunport lintel height, or a little higher in places, stanchions each side of the gunports and a cap rail. This was later changed during construction to 12 guns, fully framed and planked bulwarks (mostly) and a waist without guns between the fore and main mast. There are no known plans from 1794 through to the Royal Navy take-offs in 1815 of the captured President. There are two existing sets of paintings commissioned shortly after Constitution's victory over Guerriere, one set by Michel Fellice Corne, commissioned by Captain Isaac Hull, and another by George Ropes Jr. There are other contemporary paintings and lithographs of this shocking (to the British) victory. The Corne paintings were supervised by Hull's purser to ensure accuracy and timely completion. Ropes was a protege of Corne and his paintings generally conform to Corne's depictions. I'm using these two sets of paintings for colors and some details. Corne set of paintings of USSC in the Peabody-Essex Museum. Ropes paintings in the USS Constitution Museum. There are two contemporary models in existence. The first is a model started by a crew member that was finished with the aid of other crewmen and was presented to Captain Hull after he was assigned to other duties and Captain Bainbridge took command of Constitution. [Hull model] This model will also be a reference for details not shown on the plans or paintings. I found a set of stunning photos of this model [ Hull model photos by Evan Gale ] The second model was made from a section of damaged rail by some crew members for a sailor named Dunn who lost a leg in the battle. This model was hull only but was completed at a later date. This model is rather small, compared to the Hull model, and shows numerous details from the period of the model's completion rather than in 1812. [Dunn model] Hull model. The Corne paintings and the Hull model are in the Peabody-Essex Museum. The Ropes paintings are in the USS Constitution Museum and the Dunn model is in the Manchester Historical Museum. This is one of the few times when I wished I didn't live in California. I'm currently awaiting delivery of two books: “A Most Fortunate Ship: A Narrative History of Old Ironsides” by Tyrone Martin and “The Boats of Men-of-War” by W E May. I am considering buying “Constitution: All Sails Up and Flying” by Olof Eriksen but it doesn't yet fit into my budget (at almost US$100 it's a bit pricey). I considered "The 44-Gun Frigate USS Constitution, 'Old Ironsides' (Anatomy of the Ship)" by Karl Heinz Marquardt but it is not on my list for reasons I'll get into a bit later. After pasting the Doughty plans back together, I started to redraft them using a vectored graphics program that will allow me to scale them to the scale of the model without having my digital draft "pixelated" when it is scaled down. I started with the keel, stem and stern post components followed by deadwood and keelsons that trap the ribs. Then the ribs were drawn in the profile view according to the 1794 plans. Both of the 1794 plan re-drafts show the ribs as being doubled ribs of 11.5" / 29.2 cm - 23" / 58.4 cm total for each double rib - at 26" / 66 cm centers except for one single rib at the line of maximum beam. I learned that Marquardt has these ribs as more or less alternating single and double ribs with a much greater than 3" / 7.6 cm gap between. This is one of the few things we know about USSC with certainty because the keel and most of the lower futtocks of the ribs are original to the 1794 to 1797 construction. Since Marquardt didn't get these details right I have serious doubts about the other details in his book, which explains why it's not on my book list. Reviews of the book comment on this and other discrepancies with other sources. I may check on an inter library loan a bit later just to see if the book offers any other insights, but I see little reason to buy it. Current state of my working drawings. I'm currently finished with drafting the ribs and cant frames fore and aft in the profile view with the gunports framed and the cant frames and hanging knees/hawser frames drawn in the plan, but the hawser frames remain to be drawn in profile. I'm working on two studies of the transom and counter framing for five windows and six to help me decide which way to go based on usual practice for this framing. The Hull model has six gallery windows but the Corne and Ropes paintings show five. I found an image from Marquardt showing six. One of the lithographs I mentioned above shows seven gallery windows. I'm thinking that I'll resolve these discrepancies by what makes the most sense structurally unless I come across more information. This is probably one of those questions that will never be resolved with any certainty until someone invents a time machine or finds an account from a reliable primary source that says for sure. I suspect those two choices have about an equal probability. Stern detail on Hull model. Stern and hull detail in first Corne painting. Note the yellow ocher gun stripe and absence of gun port lids. Stern detail in first Ropes painting. Also note the gun stripe color and lack of port lids. Some things learned so far were surprises. The most surprising is the gun deck ports did not have lids except the two most foreward on each side which had single lids unlike the clam shell lids currently on USSC. The plans and Corne and Ropes paintings don't show any and the Hull model shows only the four mentioned. The CD from the museum has a scupper plan for the gun deck that shows more scuppers than seems necessary for a closed-in deck but this conclusion is more conjecture than fact. The other surprise was finding that the Hull model has skysail masts/poles connected to the royal/topgallant masts but aft of the mast instead of foreward like on the rest of the mast. Close-up of Hull model showing skysails masts/poles. Fore mast is on the right. I have promised myself that I must finish another project before even one piece for Constitution will be cut, so for a while this log will cover my research and drafting of detailed plans.


-
Woodland Scenics makes three water products. Jeff mentioned Water Effects which is similar to artist's gel medium. Here's their products: http://woodlandscenics.woodlandscenics.com/show/category/Water I used several Woodland Scenics products in Ogallala to model the tall grass prairie. They provide excellent instructions and videos for their products.